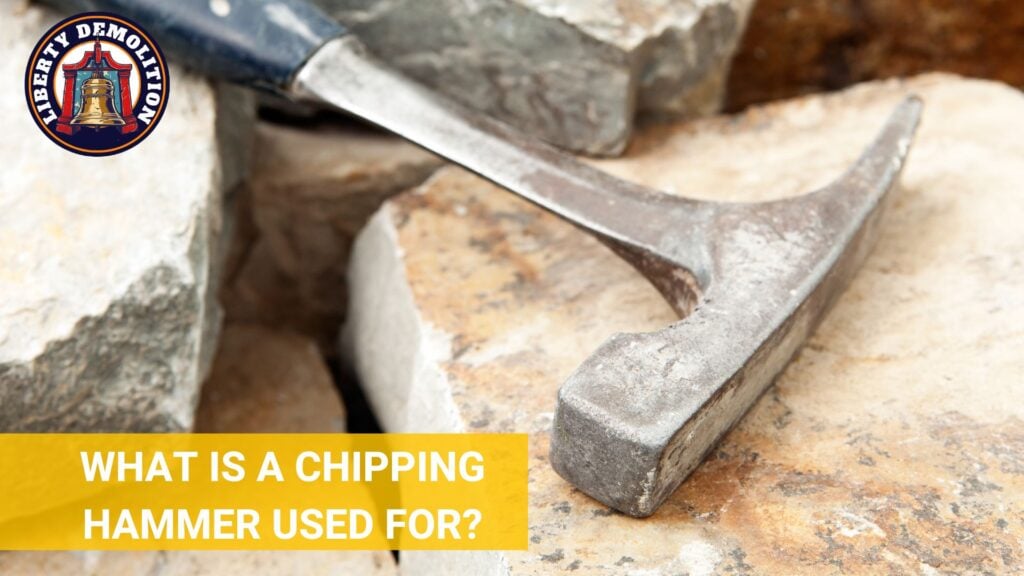
A chipping hammer is a hand tool primarily used for removing slag and spatter from welds. It typically consists of a pointed or chisel-shaped end and a flat end to provide dual functionality for welding tasks.
Discover why this tool is indispensable in welding and how it stands apart from similar tools.
What Is a Chipping Hammer?
A chipping hammer is designed primarily for welding. Its chief purpose is to clean and remove slag, the byproduct that forms over welded materials once they cool. This slag can obstruct a clear view of the weld and may interfere with further welding or finishing tasks. With a chipping hammer, welders can ensure a clean weld surface and guarantee better visibility and stronger joins.
Another common use is to remove spatter. Spatter consists of tiny particles of molten metal that fly off during welding and solidify on nearby surfaces. If not addressed, spatter can cause imperfections and weak spots on the weld. A chipping hammer helps in keeping the weld area spatter-free.
How Is a Chipping Hammer Different from Similar Tools?
While a chipping hammer may resemble other hand tools, its design and function set it apart. For instance, a regular hammer is optimized for driving nails, while the chipping hammer is built for chipping away at hard residues on metal surfaces. The dual ends – one pointed or chisel-shaped and the other flat – provide versatility that a standard hammer does not offer.
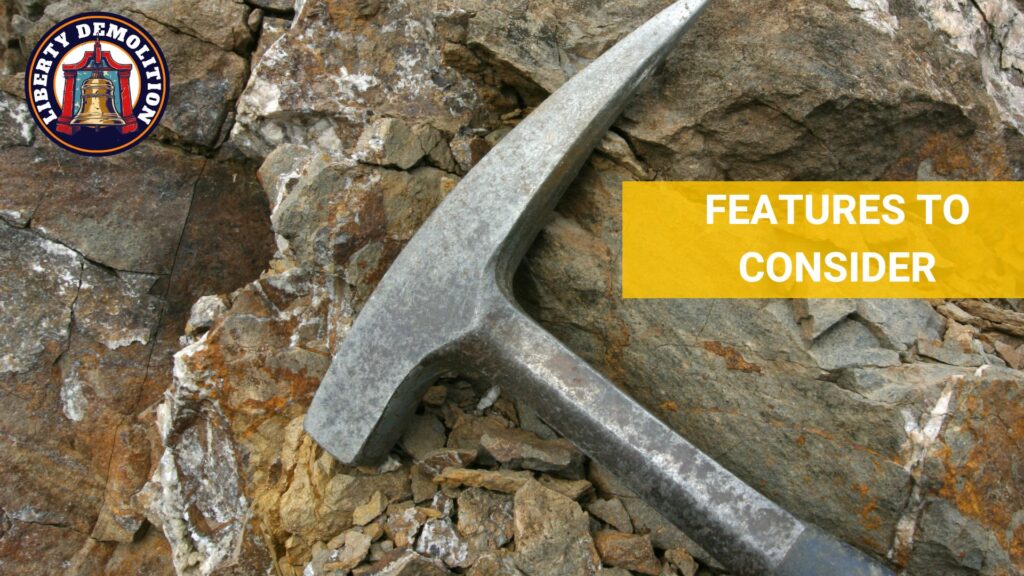
Another similar tool might be the rock hammer, which geologists use to break and collect rock samples. Though they share a similar design, their applications are distinct. The materials they’re made from and their weight and balance are tailored to their specific tasks. While these tools may look alike at a glance, they serve very different purposes.
What Is a Chipping Hammer Used For?
Chipping hammers have a specialized design and functionality that make them essential for certain tasks that no other tool can handle quite as efficiently. Here are some:
- Weld Slag Removal
Weld slag is a byproduct formed when using stick welding processes or flux-cored arc welding. When the welding rod or wire burns, the flux protects the molten metal from contaminants in the atmosphere. As this molten metal cools and solidifies, it forms a layer of slag on top.
While the slag acts as a protective barrier during the welding process, it needs to be removed afterward to inspect the quality of the weld and for further finishing. Chipping hammers, with their pointed or chisel-shaped ends, are perfect for this job. They allow welders to chip away the slag efficiently, revealing the fresh weld beneath.
- Spatter Cleanup
During welding, it’s not uncommon for tiny droplets of molten metal to be expelled from the weld pool. These droplets are termed as ‘spatter.’ Once the spatter lands on a surface, it quickly solidifies and adheres firmly.
Not only is spatter unsightly, but it can also interfere with the integrity of the weld if it lands in unwanted areas. The flat end of the chipping hammer is particularly useful for knocking off these solidified droplets from the work surface and keeping the weld area clean.
- Sculpting and Metalwork
Chipping hammers have also found a place in metal artwork and sculpting. Artists and craftsmen who work with metals often need to shape, mold, or texturize their materials. The dual functionality of the chipping hammer makes it a versatile tool for such tasks. The pointed end can be used for detailed work, while the flat end can help in giving texture or a specific finish to the metal surface.
- Masonry and Light Demolition
Although not its primary purpose, a chipping hammer can also be handy for light masonry tasks or small demolition jobs. The tool can be used to chip away at old mortar, tiles, or plaster. However, power tools and specialized equipment would be more appropriate for larger tasks or more extensive demolition.
- Maintenance of Other Tools
In some workshops, the chipping hammer doubles up as a tool for maintaining other tools. For instance, if there’s solidified material on a tool or a buildup of rust, the chipping hammer can be used to clean it off.
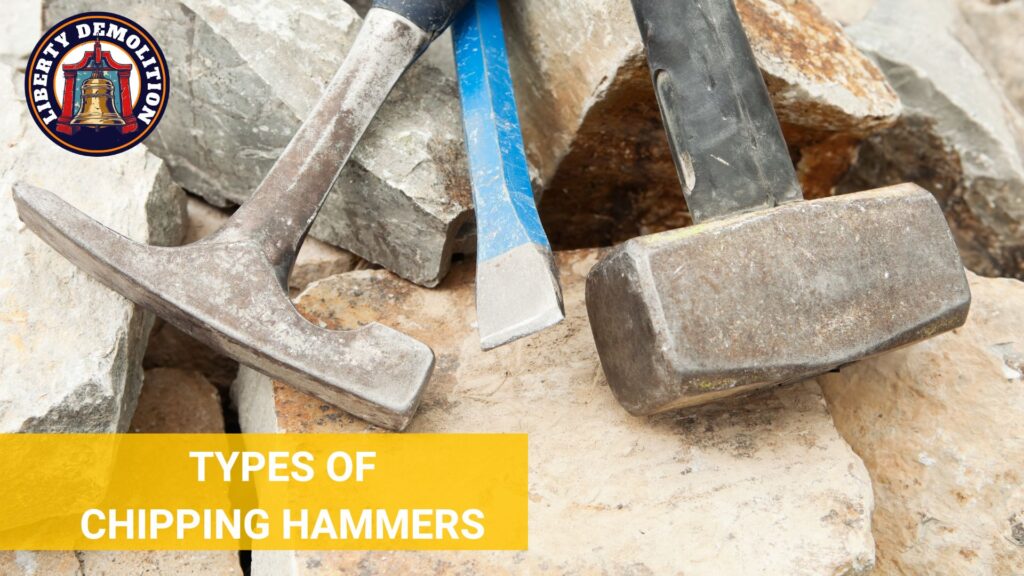
Types of Chipping Hammers
Chipping hammers come in various designs and operational modes, each tailored for specific tasks and working environments. The choice of chipping hammers often depends on the nature and volume of work, accessibility to power sources, and user preference.
Pneumatic Chipping Hammers
Pneumatic chipping hammers are powered by compressed air. They typically connect to an air compressor via a hose, which supplies the hammer with the necessary air pressure to operate.
These hammers are often used in industrial settings where there’s consistent access to a powerful air compressor. Due to their power, they are commonly employed for heavy-duty tasks like breaking concrete, demolishing old structures, or removing large quantities of weld slag.
Advantages:
- Pneumatic hammers offer a high power-to-weight ratio, which makes them efficient for demanding tasks.
- With fewer moving parts than their electric counterparts, they tend to have a longer operational life.
- They don’t generate sparks, which makes them safer in certain environments, especially where flammable gasses or materials might be present.
Limitations:
- They need a consistent supply of compressed air, which might not be available in remote locations.
- The attached hose can limit the user’s mobility and range of movement.
Electric Chipping Hammers
Electric chipping hammers are powered by electricity, either through a cord connected to a main power source or rechargeable batteries in cordless models. These are popular for both professional and home use due to their convenience. They’re often used for tasks like tile removal, light demolition, and even some masonry jobs.
Advantages:
- It doesn’t require an air compressor; just plug and play or rely on batteries.
- Cordless models allow greater mobility and can be used in remote locations without direct access to power.
- Many electric hammers come with adjustable settings, which allow users to adapt the power based on the task.
Limitations:
- While powerful, they might not be as potent as pneumatic models for extremely demanding tasks.
- Electric parts and batteries might require replacements over time.
Hand-held Manual Chipping Hammers
These are the traditional chipping hammers that require manual force to operate. They consist of a metal body, usually with pointed and flat ends. Manual chipping hammers are most commonly found in welding workshops for removing slag and spatter. They’re also used for light masonry tasks and sculpting.
Advantages:
- Without any power source or complex mechanisms, they’re straightforward to use.
- They can easily be carried in a toolkit or pocket since they’re lightweight and compact.
- They’re long-lasting and require little maintenance.
Limitations:
- They require physical effort from the user, which might be tiring for extended tasks.
- Manual hammers might not be the best choice for heavy-duty tasks like breaking thick concrete.
This table provides a quick overview of the various chipping hammers, their power sources, primary applications, advantages, and limitations:
| Type | Power Source | Primary Applications | Advantages | Limitations |
| Pneumatic Chipping Hammers | Compressed Air | Heavy-duty tasks like breaking concrete, demolishing structures, large-scale weld slag removal | High power-to-weight ratio, durable, doesn’t generate sparks | Requires air compressor, limited mobility due to attached hose |
| Electric Chipping Hammers | Electricity (Corded or Battery) | Tile removal, light demolition, masonry jobs | Convenient, adjustable settings, cordless models offer high mobility | Might be less powerful than pneumatic, parts may wear over time |
| Hand-held Manual Chipping Hammers | Manual Force | Welding slag and spatter removal, light masonry, sculpting | Simple, highly portable, durable | Requires more physical effort, limited power for heavy-duty tasks |
Features to Consider in a Chipping Hammer
Selecting the right chipping hammer is essential for ensuring both the efficiency and safety of your tasks. While the type of chipping hammer matters, the features that come with it are equally important. Here’s a look at some of the most important features to consider when choosing a chipping hammer:
Power and Impact Force
Power and impact force determine the efficiency and capability of a chipping hammer. In powered hammers, this usually relates to the energy supplied by the power source (pneumatic or electric). For manual hammers, it’s about the design and the materials used.
The power and impact force dictate the kinds of tasks the hammer can handle. More demanding tasks, such as breaking through thick concrete, require higher power and greater impact force. A more powerful hammer can accomplish tasks faster and with less effort from the user, which increases overall productivity.
What To Look For:
- Check the hammer’s specifications for power ratings (in wattage for electric hammers) or air pressure requirements (for pneumatic ones).
- For manual hammers, consider the weight and design as they influence the delivered force.
- Ensure the power aligns with your intended tasks to avoid underpowered or overpowering situations.
Weight and Ergonomics
Weight pertains to the actual heaviness of the hammer, while ergonomics concerns its design for user comfort and efficiency. A tool that’s too heavy can tire out the user quickly, affecting both efficiency and safety. Ergonomic designs allow better control over the tool and ensure precision in tasks while reducing the chances of mishaps. Moreover, repeated use of poorly designed tools can lead to physical strains or conditions like carpal tunnel syndrome.
What To Look For:
- While a heavier hammer might offer more power (especially in manual models), it can be counterproductive if it causes rapid fatigue. Find a balance between weight and function.
- Look for hammers with handles that provide a comfortable grip, possibly with padding or contours that fit the hand naturally.
- Features that reduce vibration can significantly increase comfort and reduce hand strain, especially for powered hammers.
Vibration Control and User Comfort
Vibration control refers to a tool’s ability to minimize the shaking or oscillation the user feels during its operation. User comfort, closely related to vibration control, includes the overall ease and convenience of using the hammer without causing undue strain or discomfort. Excessive vibration can lead to rapid user fatigue, which makes tasks more strenuous and decreases efficiency.
Continuous exposure to high vibration levels can lead to conditions such as Hand-Arm Vibration Syndrome (HAVS), a painful and potentially debilitating disease affecting blood vessels, nerves, and joints. Good vibration control ensures better precision, reducing the chances of errors or mishaps.
What To Look For:
- Many modern hammers incorporate design elements or materials that dampen vibrations. These can be internal mechanisms within the tool or padding and special materials in the handle.
- A soft-grip handle or one designed ergonomically can greatly enhance user comfort and reduce vibrations’ impact.
- If possible, test the tool before purchasing. Even with all the right features, personal comfort can be subjective. What feels comfortable for one person might not for another.
Attachments and Accessories
Attachments and accessories refer to additional parts or items that can be added to the chipping hammer to enhance its functionality, adapt it to specific tasks, or ensure maintenance. With the right attachments, a single chipping hammer can be adapted for various tasks, which makes it a more versatile tool. Some accessories can enhance the tool’s efficiency by improving its performance or prolonging its operational life. Certain accessories, like protective guards or shields, can increase safety by minimizing potential hazards.
What To Look For:
- Ensure any attachments or accessories are fully compatible with your chipping hammer model. Using incompatible parts can be inefficient, damage the tool, or pose safety risks.
- While some accessories might be essential for specific tasks, others might only offer incremental benefits. It’s crucial to distinguish between the two based on your needs and budget.
- Some chipping hammers come with storage cases or bags that protect the tool and offer organized spaces for all attachments and accessories. This can be especially beneficial for those who need to transport their tools frequently.

Maintenance and Care for Longevity
Proper care and regular maintenance can significantly extend the life of a chipping hammer, so let’s learn the steps to get this done:
Cleaning after Usage
After each use, it’s important to remove accumulated debris, dust, and other contaminants from the chipping hammer. Residues, especially from materials like concrete or welding slag, can decrease the hammer’s functionality if allowed to build up. The buildup of debris can create imbalances in powered hammers or obscure damages, which can lead to potential safety hazards during operation. Regular cleaning prevents corrosive materials from settling on the tool.
How To Do It:
- Before cleaning, ensure the tool is disconnected from any power source. For electric models, unplug them or remove the batteries. For pneumatic models, disconnect from the air compressor.
- Using a stiff brush, gently remove any loose particles, especially from the head and chisel or point of the hammer.
- Wipe the entire tool with a damp cloth to remove finer particles and dust. If you’ve been working with particularly sticky or greasy substances, consider using a cloth lightly soaked in a mild detergent solution.
- Once cleaned, it’s a good time to inspect the tool for any visible damages or wear. Check especially the handle, the head, and any moving parts in powered models.
- Ensure the tool is thoroughly dried before storing it, particularly in humid climates. This will prevent rust and other moisture-related issues.
- Store your chipping hammer in a dry, cool place when not in use. If it comes with a protective case or bag, use it. Not only does this keep the tool clean, but it also protects it from potential physical damage.
Additional Tips:
- Do not use aggressive cleaning agents or solvents, which might damage the tool’s materials or remove essential lubrication.
- For powered hammers, periodically check the lubrication levels, especially in pneumatic models. Proper lubrication ensures smooth operation and reduces wear.
Regular Inspection and Servicing
Inspection involves a systematic examination of the tool to identify any abnormalities, wear, or potential issues, while servicing pertains to routine maintenance tasks to ensure the tool’s optimal functionality. Regular inspections can catch potential safety hazards before they manifest as accidents or tool failures. Servicing ensures the tool functions as intended and maintains its efficiency and power. Detecting and solving issues early can save on more expensive repairs or replacements down the line.
How To Do It:
- Begin by looking over the entire tool and checking for any visible signs of damage, cracks, rust, or wear.
- For powered hammers, ensure that all moving parts are operating smoothly without any unusual noises or resistance.
- Safely test the hammer’s operation and observe any changes from its usual performance or unusual sounds.
- Ensure all necessary parts are well lubricated, particularly in pneumatic models. Lack of lubrication can cause increased wear and decrease efficiency.
- If unsure about any aspects or if the tool requires more than basic maintenance, consider getting it serviced by professionals.
Replacing Worn-out Parts and Bits
Over time and with regular use, certain parts of the chipping hammer, especially bits or chisels, may wear out and require replacement. Worn-out parts can be a safety risk, as they might break during operation. Fresh bits and well-maintained parts ensure the tool operates at its peak efficiency. Timely replacements can prevent damage to other interconnected parts, prolonging the tool’s overall lifespan.
How To Do It:
- Bits, given their direct contact with materials, tend to wear out faster. Check them for bluntness, cracks, or any deformities.
- Always ensure that replacement parts are compatible with your chipping hammer model. Incompatible parts can damage the tool or reduce its efficiency.
- Refer to the tool’s manual or manufacturer guidelines when replacing any parts. This ensures the correct installation and alignment of parts.
- After replacement, make sure all parts are securely fastened and there are no loose components.
- Before using it, test the tool after any part replacement to ensure everything functions correctly.

Frequently Asked Questions
Chipping hammers are tools that many may be familiar with, but not everyone understands their specific applications or how they differ from other tools. Here are the answers to the most frequently asked questions about chipping hammers:
Is a chipping hammer a hammer?
Yes, a chipping hammer is a type of hammer. However, unlike standard hammers used primarily for driving nails or similar tasks, a chipping hammer is designed specifically for chipping away at materials like concrete, metal slag, and weld spatter. It usually features a sharp, chisel-like end and a flatter, broader end. The design facilitates the removal of materials through chipping or scraping actions.
Is a rotary hammer a chipping hammer?
No, a rotary hammer and a chipping hammer are not the same, though they have some overlapping functions. A rotary hammer is a power tool that drills holes into hard materials like concrete or masonry using a combination of rotation and a hammering action. Many rotary hammers have a ‘hammer-only’ mode, which allows them to perform light chipping or demolition tasks, but they’re primarily designed for drilling.
On the other hand, a chipping hammer is explicitly designed for chipping, removing materials, or cleaning surfaces. While both can chip away at the material, they are optimized for different primary tasks.
Who uses a chipping hammer?
Various professionals and hobbyists find use for chipping hammers, including:
- Welders: They use chipping hammers to clean and remove slag or spatter after welding.
- Masons and Construction Workers: They use them to chip away excess concrete, shape stones, or remove old plaster.
- Metal Workers: In foundries and fabrication, these hammers can be used to remove burrs or other unwanted material residues.
- Home DIY Enthusiasts: For those tackling home renovation projects, a chipping hammer can help remove tiles and old plaster or break through thin sections of concrete.
- Artisans: Some artists working with metal or stone might use chipping hammers as part of their sculpting or shaping processes.
Ready to Use a Chipping Hammer?
Whether you’re a professional in the field or someone exploring the world of DIY, understanding how tools like chipping hammers work can sometimes come in handy. Chipping hammers come in various types and have specific functions and maintenance requirements, setting them apart from other tools.
What if you have a big demolition project that doesn’t only require basic knowledge of the tools but experience on how to use them efficiently and safely? In this case, it is better to hand the task to professional demolition contractors.
At Liberty Demolition, we appreciate the importance of both the small tools and the larger projects. We offer various demolition services, from residential to industrial scales, while prioritizing safety, environmental responsibility, and customer satisfaction. With our commitment to efficient waste management and recycling, you can be assured of an eco-friendly solution tailored to your demolition needs.
Need expert demolition contractors in Philadelphia? Choose Liberty Demolition. Call us today for a free quote.