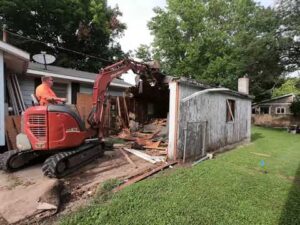
To demolish drywall, prepare the area and use appropriate tools like sledgehammers and reciprocating saws for removal. Employ safety measures, such as wearing PPE and handling electrical installations with care.
Explore our full guide for detailed steps on how to demo drywall and safety tips.
Preparation for Drywall Demolition
Before you can begin with the demo task, you must ensure that you have the tools, know what the job entails, and understand what kind of drywall you are dealing with.
Safety Measures and Equipment
Make sure that you take these precautions to reduce the risks of the demolition process:
- Check Machinery: See to it that all equipment is in optimal condition to avoid malfunctions.
- Clear Work Area: Keep the space free of clutter to prevent accidental fires.
- Emergency Tools Ready: Have fire extinguishers and other emergency tools on hand.
- Use Mechanical Aids: For heavy lifting, rely on mechanical aids and proper techniques to prevent injuries.
- Wear PPE: Always use personal protective equipment, including gloves and safety footwear.
- Hazardous Substances Awareness: Be cautious of asbestos and other harmful substances. Use respirators and work in well-ventilated areas.
- Handle Electrical Equipment Safely: De-energize electrical equipment before starting work to prevent shocks.
Identifying Types of Drywall
Before you start smashing walls, know what you’re dealing with. Here’s a brief look at the most common types of drywall and their uses:
- Standard Drywall: The most common type, also known as whiteboard, is used in various applications but offers less durability and resistance.
- Moisture-Resistant (Green Board): Designed for areas with moderate wetness, like kitchens and bathrooms. Resistant, but not waterproof.
- Mold-Resistant (Purple Board): Offers enhanced moisture and mold resistance, suitable for wet areas.
- Fire-Resistant (Type X Drywall): Contains non-combustible fibers, used in garages and apartment buildings for better fire rating.
- Sound Dampening Drywall: Used in studios and high-noise areas, layered with gypsum and a noise-reducing membrane.
- Eco-Friendly Drywall: Made from recycled materials, offering similar performance to standard drywall.
- Paperless Drywall: Replaces paper with fiberglass, increasing mold and moisture resistance.
- Plasterboard (Blue Board): Ideal for veneer plastering, not suitable for wet conditions.
- Damage-Resistant Drywall: Ideal for high-traffic areas, designed to withstand more wear and tear.
- Flexible Drywall: Used for curved walls and ceilings.
- Lightweight Drywall: Lighter than standard drywall, often used for ceilings and high walls.
- Foil-backed Drywall: Suitable for the interior faces of exterior walls, not moisture-resistant.
- VOC Absorbent Drywall: Absorbs and neutralizes volatile organic compounds.
Each type of drywall requires specific handling and disposal techniques. For example, standard, moisture-resistant, and mold-resistant drywalls can be handled similarly, but care must be taken with fire-resistant or foil-backed types due to their specialized materials.
Eco-friendly and paperless drywalls are more sustainable options and may have different recycling or disposal requirements.
For detailed handling and disposal guidelines, it’s advisable to consult with professionals or local regulations, especially when dealing with older drywall that might contain hazardous materials like asbestos.
Room and Furniture Preparation
Get your space ready. Clear out furniture and any valuable items to avoid damage. Cover floors and any remaining items with drop cloths or plastic sheeting to protect them from dust and debris.
Seal off the work area as much as possible to contain the mess. And don’t forget about dust control. It’s not just about cleanliness. Dust from drywall can be harmful, so use dust barriers or water sprays to keep it under control. This preparation step might seem like extra work, but it’s all about doing a clean and safe job.
Tools and Materials Needed for Drywall Demolition
For effective drywall demolition, you’ll need specific tools that cater to precision and safety. These tools ensure that the demolition process is not only efficient but also minimizes damage to the surrounding areas.
- Sledgehammer: Ideal for breaking down walls and ceilings.
- Reciprocating Saw: With the appropriate blade, it can cut through wood, plastic, and plaster.
- Pry Bar: Useful for wedging and separating materials.
- Nail Puller: Crucial for removing nails after drywall removal.
- Demo Fork: Effective for removing underlying boards, especially in older homes.
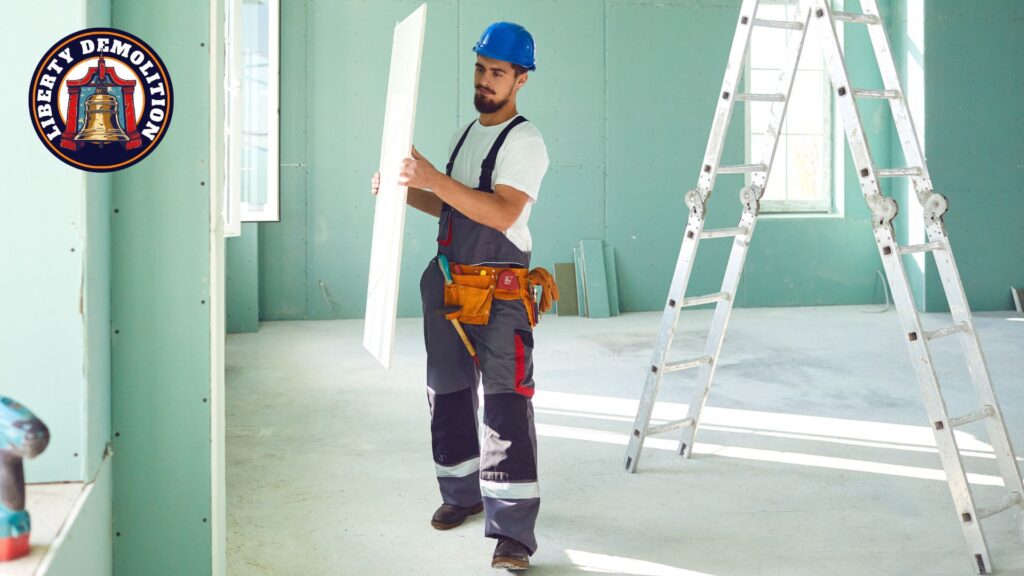
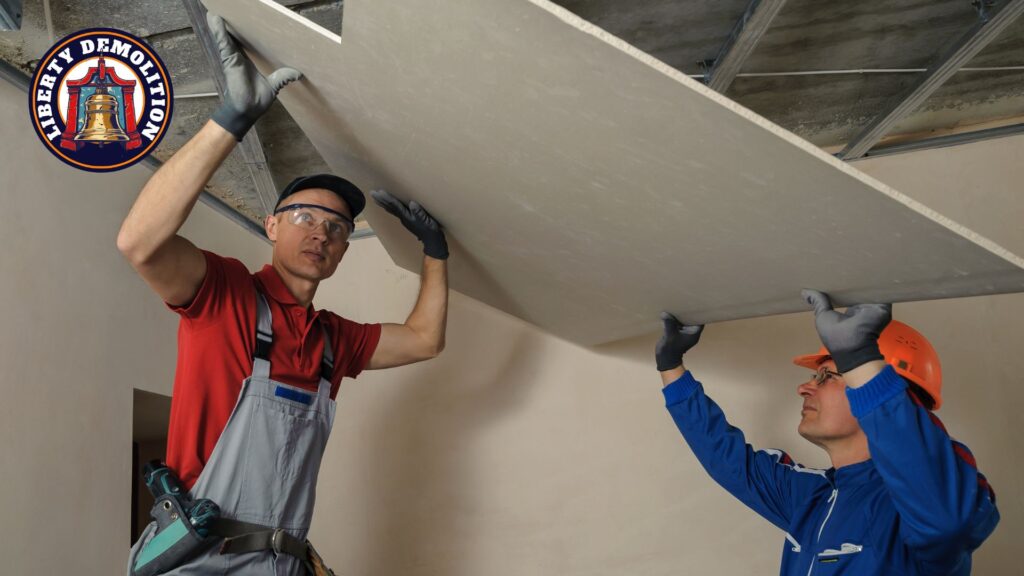
Protective Gear for Safe Demolition
Before you start, make sure to gear up properly. More than a necessity, it ensures your safety during the demolition process.
This includes wearing safety glasses to protect your eyes from dust and debris, a hard hat for head protection, and a dust mask or respirator, especially if the work generates a lot of dust. Don’t forget to wear gloves to protect your hands from sharp edges and splinters.
Disposal Supplies for Clean-up
Post-demolition cleanup is as crucial as the demolition itself. You need the right supplies to manage the debris efficiently and safely.
Ensure you have heavy-duty trash bags or containers for smaller debris. For larger pieces of drywall and other materials, you might need a dumpster. Also, consider having brooms, dustpans, and possibly a shop vacuum for thorough cleaning of the site.
Proper disposal is not just about tidiness; it’s about minimizing the environmental impact and ensuring safety for everyone around the demolition site. Remember to adhere to local regulations for disposing of construction waste, especially if it contains hazardous materials like asbestos or lead.
Step-by-Step Guide to Drywall Demolition
When you’re done with the prep stage, it’s time to get your hands working (not unless you changed your mind and would rather let a pro handle the job). Here are the steps on how to demo the drywall:
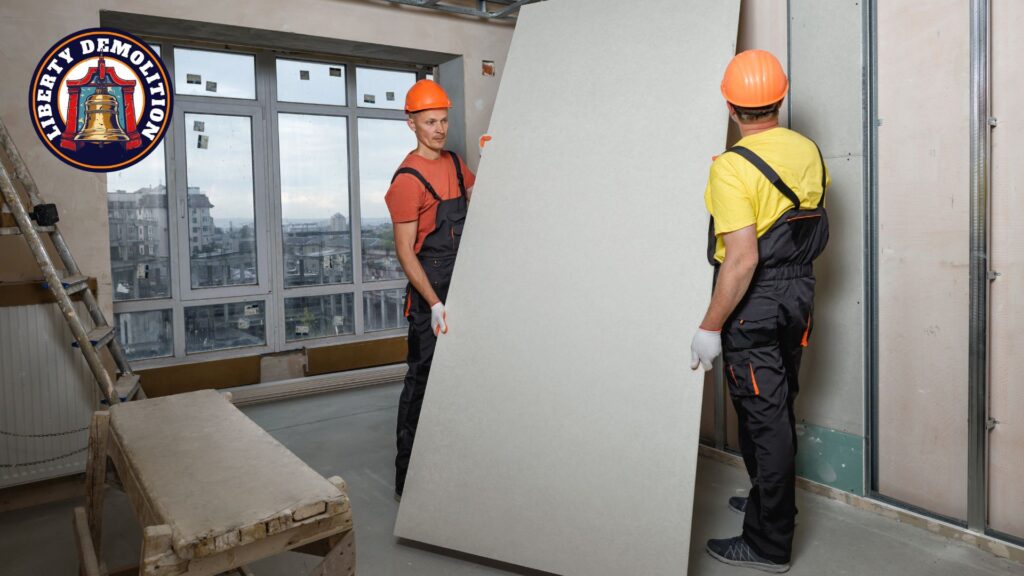
Cutting and Removing Drywall Sections
- Measure and Mark: Identify and mark the section of drywall to be removed.
- Initial Cut: Use a reciprocating or oscillating saw with a circular blade to cut the marked area, ensuring only the drywall is cut through.
- Score for Partial Removals: For partial removal, score along a stud to create a boundary.
- Remove Drywall Piece: If the drywall doesn’t come out easily after cutting, use a drywall knife or prying tool for removal.
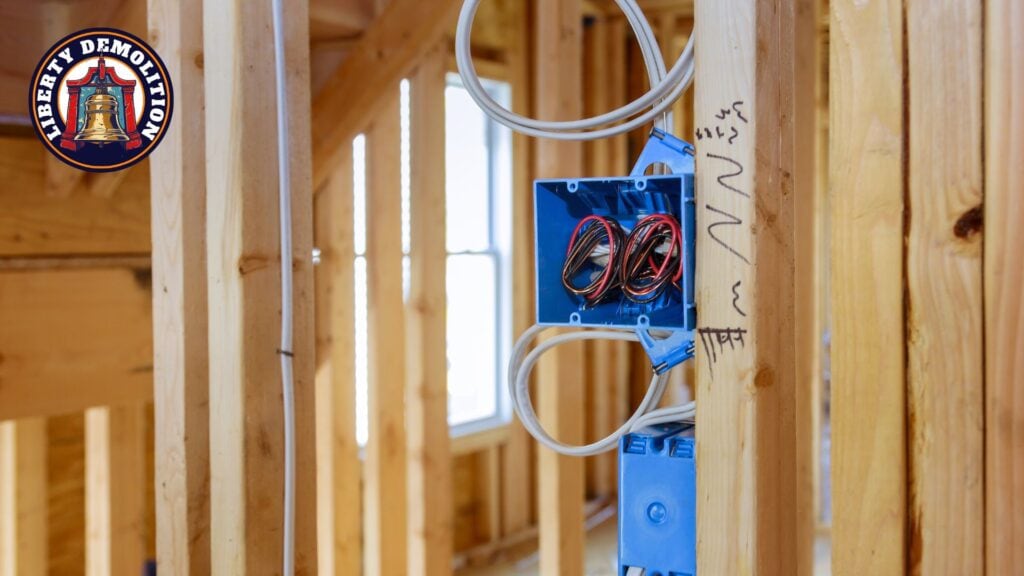
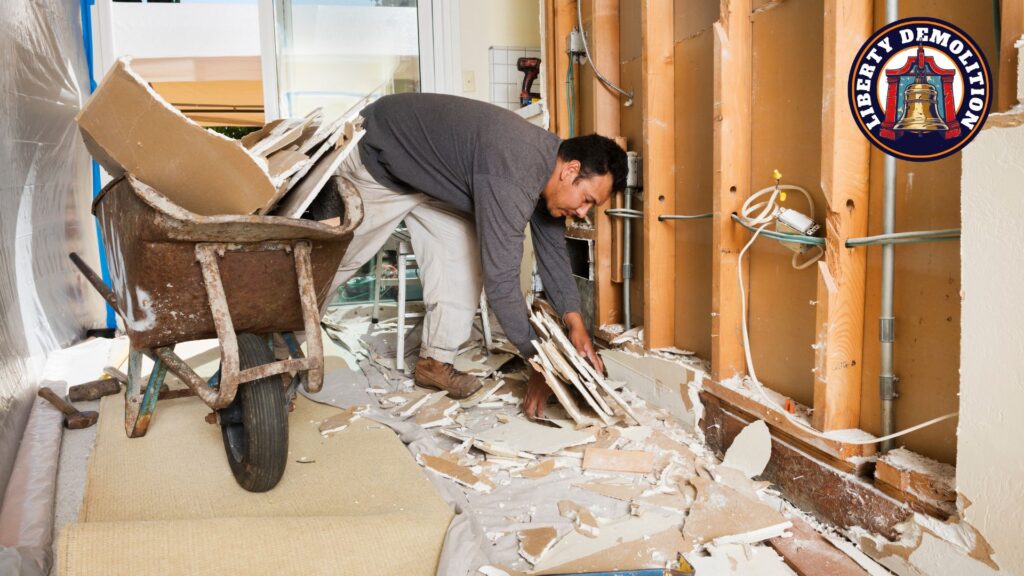
Handling Drywall with Electrical Installations
When dealing with drywall that has electrical installations, turn off the power to the area you are working on before you begin. Carefully remove any obstacles, such as electrical outlet covers, light switch plates, and HVAC grills and vents.
Use a stud finder to avoid cutting into electrical boxes when you’re sawing through the drywall. After removing the drywall, inspect the area for any exposed wiring or electrical boxes, and proceed with caution.
Techniques for Minimizing Dust and Debris
Minimizing dust and debris is key to a clean demolition process. Use a utility knife to cut through joint compounds at wall and ceiling corners for easier tear-out. When pulling out drywall by hand, wear sturdy gloves and consider using a wet or dry vacuum to collect dust and debris.
Break down larger panels you don’t plan to keep by scoring and folding them, making them easier to remove. If you’ve laid plastic sheeting or a tarp, use it to collect and remove debris, and then sweep and vacuum any remaining small particles.
Disposal of Demolished Drywall
Sorting and separating drywall waste is a crucial initial step in recycling it. Recycling facilities thoroughly examine drywall pieces to remove contaminants such as nails, screws, and insulation particles.
This ensures that the gypsum in the drywall is pure and meets industry standards for recycling. Detailed inspections and specialized equipment are used in these facilities to achieve the desired purity of the gypsum for reuse.
Eco-friendly Disposal Options
Recycling is the most eco-friendly option for disposing of drywall, as it helps reduce landfill waste and save natural resources. The process typically involves collecting old drywall, grinding it to remove contaminants, separating the paper from the gypsum, and then processing the gypsum into powder or pellets for reuse.
Manufacturers can use recycled drywall to produce new drywall, soil amendments, cement, and other gypsum-based products. This approach not only conserves resources but also contributes to environmental sustainability.
Local Regulations and Best Practices
The US Environmental Protection Agency (EPA) mandates complete separation of drywall from general construction waste streams. Drywall consists mainly of gypsum plaster, which can release hydrogen sulfide gas when in proximity to biodegradable substances. This gas is not only toxic but also flammable and corrosive.
Therefore, it’s important to comply with hazardous waste disposal regulations when disposing of drywall. It is advised to consult local regulations and guidelines for the proper disposal methods in your area, as they can vary based on regional environmental policies.
Additionally, when renting disposal bins specifically for drywall, it’s crucial to avoid mixing them with other types of waste, as this can complicate the recycling process and potentially lead to additional costs. Regular drywall, green board drywall, and fire-resistant drywall are the primary types that can be disposed of in these bins.
Post-Demolition Clean-up and Site Restoration
Post-construction cleaning typically involves three phases: rough cleaning, light cleaning, and final cleaning.
The rough cleaning phase includes removing debris and initial vacuuming. During the light cleaning phase, detailed cleaning of surfaces and windows takes place. The final cleaning phase is about perfecting the details to ensure the space is clean and ready for occupancy. A wet-dry vacuum is particularly effective for removing larger debris and dust.
Checking for Structural Integrity
After demolition, it’s crucial to check the structural integrity of the remaining building. Inspect the framework, load-bearing walls, and foundations for any potential damage caused during demolition.
This step is critical to ensuring the safety and stability of the structure before proceeding with any further renovation or construction work. It might be necessary to consult with structural engineers or construction experts to perform these assessments.
Tips for Preparing the Site for the Next Steps
Preparing the site for the next steps involves several key actions:
- Proper Waste Disposal: Dispose of demolition waste as per local regulations and environmental safety best practices.
- Sort and Recycle Materials: Efficiently manage waste by sorting and recycling.
- Conduct Post-Cleanup Inspections: Ensure no debris or hazardous materials are left behind.
- Plan the Next Construction Phase: Finalize designs, secure necessary permits, and schedule the next contractors.
Troubleshooting Common Issues in Drywall Demolition
Here are some of the issues that commonly happen when dealing with drywall demo:
Unexpected Wall Damage
When unexpected wall damage is encountered during drywall demolition, it’s important to assess the damage carefully. An assessment will determine if simple repairs are sufficient or if more extensive work is required. The right tools and materials can easily repair minor damage, such as small cracks or holes.
However, for more severe damage, like extensive water damage or large holes, professional assistance might be required. Always consider your skill level and the extent of the damage before deciding whether to tackle the repairs yourself or hire a professional.
Stubborn Fixtures and Adhesives
When removing tile from the wall, it is crucial to take care and avoid damaging the drywall. Using heavy equipment and crowbars can be effective, but it’s crucial to do so carefully.
If adhesives or fixtures are proving difficult to remove, consider using tools like a pry bar or a reciprocating saw. It’s also helpful to apply heat or a solvent to soften the adhesive before attempting to remove it. Remember, patience and the right technique are key to avoiding further damage to the walls.
Mold or water damage
Mold or water damage to drywall requires immediate attention. First, identify the source of the moisture and do something about it to prevent further damage.
For mold, safety is key; wearing protective gear like gloves and masks is essential. Small areas of mold can often be cleaned with a solution of water and detergent, but for larger infestations, it’s advisable to consult a professional.
In the case of water-damaged drywall, the extent of the damage will dictate whether the drywall needs to be repaired or replaced. Water-damaged drywall can lose structural integrity, making it unsafe and necessary to replace.
Remember, when dealing with any of these issues, safety should always be your top priority. If you’re unsure about how to proceed, it’s always better to consult with a professional.
Professional Assistance vs. DIY Demolition
Professional help should be sought for drywall demolition under certain conditions. If you’re dealing with large-scale demolition, particularly in areas with intricate structural elements, it’s advisable to hire professionals. This is especially true if there’s a risk of encountering hazardous materials like asbestos, which require specialized handling and disposal.
Additionally, if you notice signs of significant wall damage, such as wavy or sagging walls, extensive cracks or holes, peeling or flaking paint indicating moisture damage, or stains and discoloration that could suggest mold, it’s time to call in experts. Professionals have the necessary training, experience, and equipment to handle these complex situations safely and efficiently.
Cost-Benefit Analysis of DIY vs. Professional Services
When deciding between DIY and professional services for drywall demolition, consider factors like the scale of the project, your skill level, the cost of renting or buying the necessary tools, and the potential risks involved. DIY can be more cost-effective for small, straightforward projects if you have the right skills and tools.
However, for larger or more complex projects, the cost of professional services often outweighs the potential risks and time investment of a DIY approach. Professionals ensure compliance with local building codes and can efficiently handle debris disposal in an environmentally responsible manner.
Choose the Experts at Liberty Demolition
Demolishing drywall is a task that demands precision, safety, and the right know-how. While the DIY technique might tempt you, the complexities and risks involved make it a job for professionals.
That’s where Liberty Demolition excels. We understand how to handle different drywall types, adhere to stringent safety protocols, and ensure environmentally conscious disposal. So, if you are planning to demolish drywall, reach out to us.
At Liberty Demolition, we guarantee competent pricing, transparent transactions, and top-notch service. Let us take the burden off your shoulders and turn your demolition project into a hassle-free experience.