To demo wood paneling, start by turning off utilities, removing trim and moldings, and inspecting for wiring and plumbing. Then, determine how the paneling is attached and gently remove it while taking care to repair any wall damage.
Explore the article further for detailed techniques and safety tips on how to demo wood paneling.
Step-by-Step Guide to Demolishing Wood Paneling
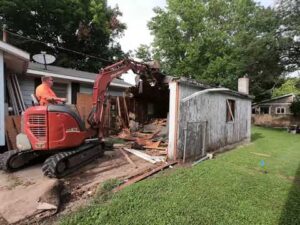
Demolishing wood paneling is a hands-on job, and safety must be your top priority. Wear the proper gear and prepare the area. Before getting down to business, it’s crucial to understand what you’re dealing with.
Inspecting for Electrical Wiring and Plumbing
1. Identifying Potential Hazards
Before starting the demolition of wood paneling, it is crucial to recognize potential hazards that electrical wiring and plumbing might present. During the demolition process, it is easy to damage these, as they are often concealed behind walls.
To reduce the risks of accidents, such as puncturing a water line or nicking an electrical wire, it is essential to turn off all utilities in the demolition area, including electricity, water, and gas. This fundamental safety step is pivotal in preventing hazardous situations and avoiding costly damages.
2. Using an Electrical Installation and Demolition Checklist
This checklist, typically used by professionals, is instrumental in ensuring adherence to all safety protocols and includes the inspection of both aboveground and underground electrical works. The primary purpose of this checklist is to identify potential hazards that could cause injury.
3. Inspecting Outlet Covers and Switch Plates
The inspection process starts with the removal of any outlet covers and switch plates. This step is simple yet revealing, as it can provide significant insights into what lies behind the paneling.
Utilizing a flashlight, thoroughly inspect the exposed areas for any signs of wiring or plumbing. Exercise special caution in older houses, where outdated or non-standard installations are more likely to be encountered.
4. Consulting a Structural Engineer or Qualified Contractor
In situations where there is uncertainty about the presence of load-bearing walls or the structural implications of the demolition, consulting a structural engineer or a qualified contractor is recommended.
These professionals can offer expert guidance and help in identifying load-bearing elements, which are crucial for maintaining the structural integrity of the building during the demolition process.
Removing Trim and Moldings
When demolishing wood paneling, carefully follow a few steps to remove trim and moldings without damaging the materials, especially if you plan to reuse them.
1. Removing Trim and Molding
Start the removal process by using a flathead screwdriver and pliers to detach any trim or molding at the top and bottom of the paneling. Ensure safety by first removing electrical outlets or light switches and turning off the power to the room at the circuit breaker.
2. Methodical Removal Process
Begin removing the trim from one end and progressively work towards the other end. This technique allows for using leverage effectively, aiding in loosening nails without causing damage.
However, it is important to exercise caution to prevent snapping the trim by applying excessive force. When prying, do so against studs rather than bare drywall to prevent damage. Identifying studs can often be done by locating nails along the top of the baseboard.
3. Nail Removal Technique
To prevent damage to the molding, extract nails by pulling them through the back of the molding using nippers or end-cutting pliers. This method helps in avoiding splintering. In cases where a nail breaks off, trim it as close as possible to the wood and leave the remainder.
Gently pry off both mitered moldings together to separate the joint, as miters are often secured with finish nails at the joint.
4. Labeling for Reinstallation
If you plan to reuse the moldings, label them accurately. This will assist in easily identifying and matching them to their original positions during the reinstallation process.
Loosening and Removing Panels
Here’s a step-by-step guide to help you with this process:
1. Initial Preparations
Before you start, remove any trim pieces, baseboards, and moldings. For safety, turn off the power to the room at the circuit breaker and use a flathead screwdriver and pliers to remove any electrical outlet or light switch covers.
2. Identifying the Type of Fastening
Next, identify how the paneling is attached to the wall. This could be with screws, nails, or glue. The method of attachment will dictate the tools and approach needed for successful removal.
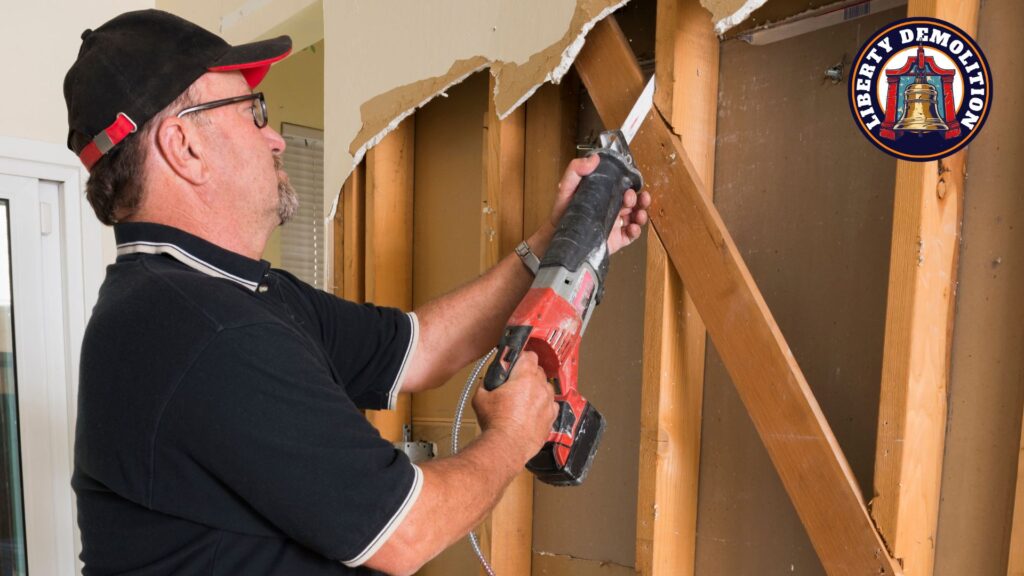
3. Removing Screwed or Nailed Paneling
If the paneling is secured with screws, use a power drill or screwdriver to remove them. For nailed paneling, use a hammer and pry bar. Be gentle during this process to avoid damaging the underlying drywall or plaster.
4. Dealing with Glued Paneling
Glued paneling can be more challenging. You might need to use a heat gun to soften the adhesive. Work slowly and carefully to avoid damaging the wall. If there’s residue left after removing the panels, use a scraper or solvents like mineral spirits or acetone to clean it off.
5. Repairing Wall Damage
After panel removal, inspect the wall for any damage. You might need to patch holes or repair gouges with drywall putty. Ensure the wall is smooth and clean before applying new paint or wallpaper.
6. Disposing of Old Paneling
Dispose of the removed paneling responsibly. If the wood is in good condition, consider donating it for reuse or recycling. Otherwise, it should be disposed of in accordance with local regulations.
Remember, if the paneling is glued to the wall, especially with older cement plaster, it can be very challenging to remove. In some cases, you might end up pulling some of the plaster or drywall away with the paneling, which would require additional repair work.
Throughout the process, go slowly and methodically to avoid unnecessary damage to your walls and ensure a smooth finish for your new wall treatment.
Techniques for Minimizing Damage to Walls
Here are the steps for gentle removal, dealing with adhesive or nails, and assessing and repairing wall damage:
Gentle Removal Tactics
To minimize wall damage during wood paneling removal, use the appropriate tools and methods:
- Use a Pry Bar and Hammer: Gently insert a pry bar into the seams of the paneling and use a hammer to carefully loosen the panels.
- Flathead Screwdriver for Prying: This can be used to gently pry the panels away from the wall.
- Diagonal Pliers for Nail Extraction: These are useful for smoothly pulling out any nails.
- Careful Handling: Work slowly and carefully to prevent damage to the drywall or plaster beneath the paneling.
Dealing with Adhesives or Nails
For Nailed Paneling
Pry the paneling away and use pliers to remove exposed nails. Take care not to damage the wall studs or drywall.
For Glued Paneling
Use a heat gun to soften the adhesive, then carefully pry the paneling off. In cases where the adhesive is stubborn, scoring the paneling with a utility knife and using a scraper or solvents like mineral spirits or acetone might be necessary.
Assessing and Repairing Wall Damage
- Inspect the Wall: After removing the paneling, check for any damage such as holes, gouges, or cracks.
- Use Drywall Putty: Fill small holes and cracks with drywall putty. Ensure a smooth application for an even surface.
- Sanding and Repainting: If drywall damage occurs, it might be necessary to replace damaged sections or use a joint compound for repairs. Sand down the repaired areas and repaint them to match the surrounding walls.
Proper Handling and Disposal of Old Wood Paneling
Handling and disposing of old wood paneling involves several steps to ensure that the process is efficient and environmentally friendly.
Sorting and Segregating Materials
When removing wood paneling, it’s important to sort and segregate the materials. Separate any trim, nails, and other non-wood elements from the wood paneling. This helps in identifying materials that can be recycled or reused.
Use appropriate tools like a screwdriver or pliers to remove screws or nails if they are used to attach the paneling. To remove adhesive residues from glued paneling, use a heat gun and scraper.
Eco-Friendly Disposal Options
Disposing of old wood paneling in an eco-friendly manner is crucial to avoid environmental harm. For wood that is still in good condition, consider donating it to organizations like Rebuilding Exchange, which refurbish wood for various projects.
If the wood is not reusable, recycling is a good option. Contact your local sanitation department to find a wood recycling facility and inquire about the types of wood they accept. Remember, treated or painted wood is harder to recycle due to the release of toxic chemicals as it breaks down.
Upcycling Old Wood Panels
Upcycling old wood panels can be a creative and eco-friendly way to repurpose materials. Here are some ideas for crafts and projects you can do with them:
- Wall Art: Use wood panels as canvases to create unique pieces of art. Sand down the panels and paint or stencil your designs. This can add a rustic charm to any room.
- Headboard for Beds: Old wood panels can be transformed into a vintage-style headboard. Attach panels together to fit the width of your bed, sand, and stain or paint them to match your bedroom decor.
- Garden Planters: Cut the panels to create box shapes and use them as planters for your garden. Ensure proper drainage by drilling holes in the bottom and lining them with landscape fabric.
- Shelving: Create custom shelves by cutting the wood panels to your desired length. Sand and paint or stain them, then mount them on walls for a rustic look.
- Room Divider: Connect several wood panels with hinges to create a folding room divider. This can be left in its rustic state or painted to fit the room’s theme.
- Picture Frames: Cut the wood into smaller pieces to create unique picture frames. Sand the edges smooth and insert glass or clear plastic for a charming, rustic photo display.
- Coasters: Cut the wood panels into small squares for coasters. Sand the edges and seal them with a waterproof coating to protect them from moisture.
- Furniture Updates: Attach wood panels to the fronts of drawers on a dresser or cabinet doors for an updated look. Sand, paint, or stain to match your furniture style.
- Signage: Create custom signs for your home or as gifts. Paint or stencil letters or designs onto the panels for a personalized touch.
- Wall Mounted Coat Rack: Attach hooks to a wood panel to create a rustic coat rack. This can be a functional and stylish addition to your entryway.
Each of these projects requires basic tools like a saw for cutting, sandpaper for smoothing edges, and paint or stain for finishing. They offer a wonderful opportunity to get creative and give old wood panels a new life.
Wrapping It Up: Why Choose the Pros
Tearing down wood paneling is serious work. It’s not just about ripping things apart. It’s about doing it right and keeping everything else safe and sound. That’s why you need a team that knows their stuff.
At Liberty Demolition, we’re all about being safe, smart, and efficient. Our team of demolition contractors is trained, licensed, and insured, so you know you’re in good hands. We look into every detail, from checking wires and pipes to making sure nothing valuable gets trashed.
Planning to take down some wood paneling? Reach out to us at Liberty Demolition. We promise to get the job done right – safely, quickly, and without any hidden costs. Check our site for an updated pricing list. If you’re in Philly and surrounding areas, let us handle the heavy lifting for you.