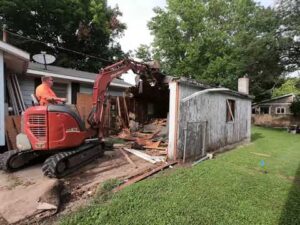
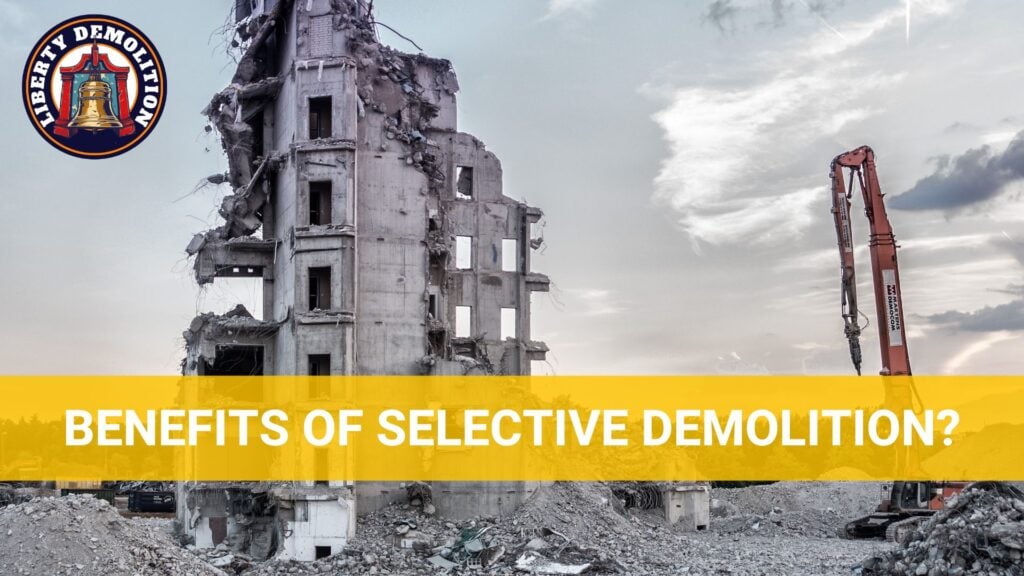
Selective demolition is a process whereby specific structures or components of a building are carefully removed without causing harm to the remaining structure, often to facilitate renovation or restoration. It contrasts with total demolition, where an entire building is taken down. This method prioritizes preservation, safety, and sustainability.
Discover the process of selective demolition and how it can be beneficial in various construction projects.
What is Selective Site Demolition?
Selective site demolition is a targeted approach in the demolition industry. Instead of tearing down an entire building or structure, the focus is on removing specific parts. This technique is crucial in renovation projects, historical preservation, or any circumstance where certain parts of a structure need to remain undisturbed.
What is the Process of Selective Demolition?
The process of selective demolition involves several key steps:
- Surveying the Site: This step helps in identifying which sections need to be demolished and which should remain untouched.
- Creating a Plan: This includes a clear layout of areas to be demolished and the methods to be used.
- Safety Measures: This might include setting up barriers, signage, and ensuring all personnel have the required safety equipment.
- Execution: This can be done manually using tools or mechanically using machinery, depending on the project’s scale and requirements.
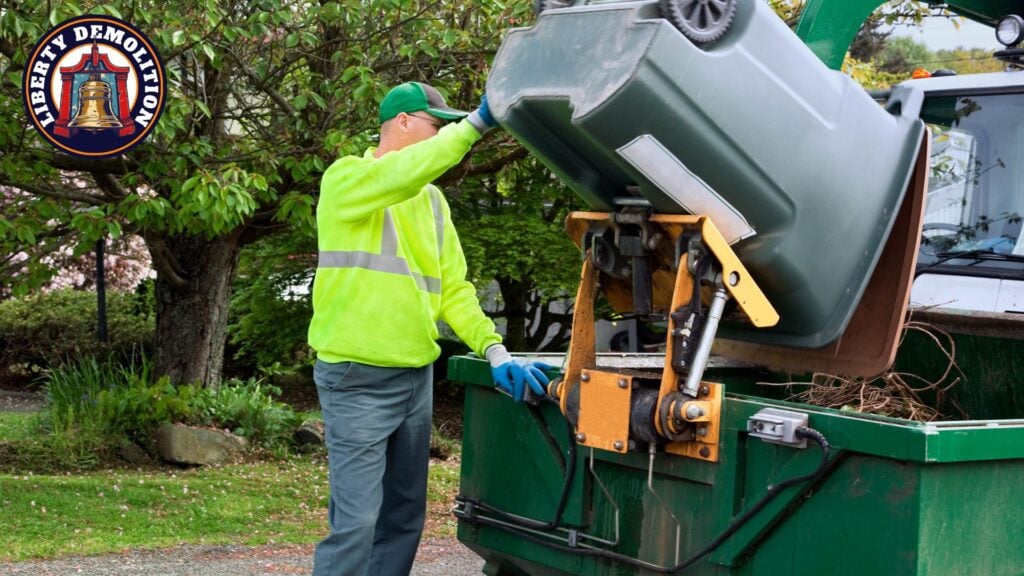
- Waste Management: As the demolition progresses, waste is collected and disposed of or recycled as per regulations and guidelines.
Comparison: Selective Demolition vs. Total Demolition
While both selective and total demolition have their places in the construction and renovation industry, they serve different purposes.
Selective Demolition
- Purpose: Targeted removal of specific sections of a structure.
- Advantages: Allows for preservation, less waste, and can be more cost-effective in certain scenarios.
- Usage: Typically used in remodeling, renovations, or when working with historical sites.
Total Demolition
- Purpose: Complete removal of an entire structure.
- Advantages: Efficient when an entire site needs clearing for a new construction project.
- Usage: Employed when the entire building is beyond repair, or there’s a need for a completely new structure on the site.
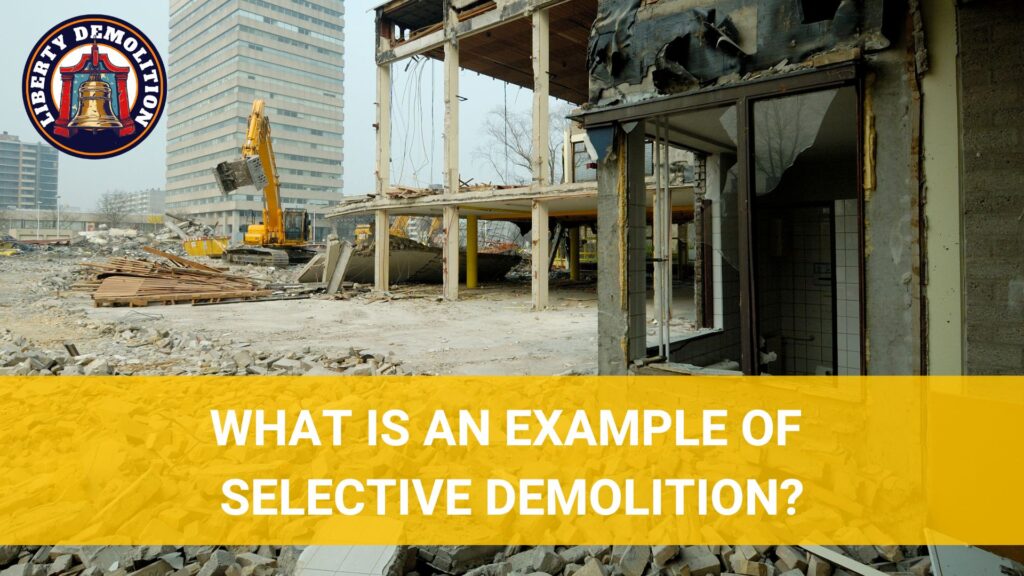
Selective Demolition Guide: Sample Projects
Understanding selective demolition becomes easier when we look at real-world examples.
Applications of Selective Demolition
- Renovation Projects
Imagine an old commercial building that’s been bought for a modern business hub. The new owners want to maintain the building’s classic exterior, but they need the interior to be revamped to suit modern workspaces.
This is where selective demolition comes in. The process would involve stripping away old interior walls, ceiling tiles, or outdated utilities while ensuring the building’s facade and other key architectural elements remain untouched. The careful and targeted approach ensures that while the building gets its required update, it doesn’t lose its original charm or historical significance.
- Historical Restorations
Historical sites and buildings have great cultural and historical significance. Tearing them down isn’t just a loss for a community but also for history. Yet, over time, certain parts of these structures might become unstable or unsuitable for public visitation.
For example, the main building of a historical structure is sound, but the wooden extensions added later are infested with termites. Using selective demolition, these newer extensions can be carefully removed without causing harm to the original brickwork and design of the structure. It can then be restored to its former glory while making sure it continues to stand as a testament to history.
- Infrastructure Upgrades
With the rapid development of technology and increasing urbanization, our infrastructure needs regular upgrades. This might involve updating old subway stations without disrupting the train lines or enhancing a bridge without shutting down the entire structure.
Consider an old subway station: over decades, certain platforms might need widening, old utilities might require replacements, or the ceiling might need reinforcements. Instead of shutting down the entire station or building a new one, selective demolition allows for precise modifications.
Old tiles can be removed, specific sections of a platform can be dismantled, and outdated utilities can be replaced – all while ensuring the majority of the station remains operational.
Key Benefits of Selective Demolition
Selective demolition, with its strategic approach, offers many advantages that cater to the immediate goals of a project and broader societal and environmental benefits.
Sustainability and Eco-friendliness
- Material Reuse: This demolition technique can salvage and reuse materials. For instance, bricks, tiles, beams, and even architectural elements like fireplaces or staircases can be repurposed, either within the same project or elsewhere.
- Reduced Landfill Waste: As only targeted sections are demolished, there’s a significant reduction in waste generated.
- Minimized Disruption to Surroundings: Total demolitions can often disturb local ecosystems, particularly if they are large-scale. Selective demolition minimizes this disruption by limiting the scale of the operation.
Cost-effectiveness and Time Savings
- Lesser Material Purchase: Since many materials can be salvaged and reused, there’s a substantial saving on purchasing new materials.
- Reduced Labor and Machine Time: A smaller-scale operation often means fewer labor hours and less machinery time.
- Operational Continuity: In many scenarios, like infrastructure upgrades, selective demolition allows the rest of the structure to remain operational. This means no loss of revenue or functionality during the demolition and reconstruction phase.
Preserving Architectural Heritage and Valuable Structures
- Honoring History: By using selective demolition, it’s possible to renovate and restore historical buildings without losing the essence of what makes them special.
- Maintaining Aesthetic Value: Often, older buildings have an aesthetic that’s hard to replicate with modern construction techniques. Selective demolition ensures that these aesthetics are preserved.
- Structural Integrity: Selective demolition ensures that only the compromised sections are dealt with, preserving the overall structural integrity of the building.
Preliminary Steps for a Successful Selective Demolition
Before the actual demolition work begins, certain preliminary steps are crucial to ensure the project proceeds smoothly, safely, and efficiently.
Step #1: Comprehensive Site Evaluation
A thorough site assessment is not just about looking at blueprints but getting a real-world sense of the structure and its surroundings.
- Structural Assessment: A close look at the structural integrity of the building helps in understanding which parts are stable, which are compromised, and how the demolition of certain sections might affect the whole.
- Utility Mapping: Often, buildings have a complex web of utilities running through them – electrical wires, plumbing, gas lines, and more. Identifying and mapping these is crucial to avoid accidents and ensure that essential utilities aren’t unintentionally disrupted.
- Surrounding Analysis: A look at the surroundings ensures that the demolition doesn’t negatively impact neighboring structures, roadways, or natural features.
Step #2: Identifying Materials for Salvage
A significant advantage of selective demolition is the opportunity for material reuse. But this requires foresight and planning.
- Material Inventory: A detailed inventory of materials that can be salvaged is drawn up. This includes bricks, wooden beams, tiles, metal fixtures, and even specific architectural elements.
- Assessing Quality: Not all materials from a site will be in a condition for reuse. It’s important to assess the quality and durability of these materials.
- Storage Plans: Once materials are identified for salvage, there needs to be a plan for their storage. They should be carefully removed, categorized, and stored in a manner that preserves their integrity.
Step #3: Coordination with Other Construction Phases
Selective demolition is typically a part of a larger construction or renovation process. It’s essential that it is seamlessly implemented with other phases of the project.
- Timeline Coordination: The demolition phase should be scheduled such that it doesn’t hinder other aspects of the construction.
- Safety Protocols: As other construction phases might be ongoing simultaneously, there needs to be a clear set of safety protocols.
- Resource Management: Heavy machinery, cranes, or dumpsters might be needed for both demolition and other construction activities. Coordinating their use ensures that resources are used efficiently and there’s no downtime due to unavailability.

Safety Protocols and Measures
Safety is important in any demolition activity, so much more in selective demolition where there’s a meticulous blend of destruction and preservation.
Best Practices for a Hazard-Free Site
- Securing the Site: Before any work begins, the site should be properly cordoned off. Barriers, fences, and clear signage should be put up to prevent unauthorized access.
- Clear Access Paths: Ensuring there are clear paths for workers to move about, as well as for machinery and equipment, is essential. These paths should be kept free of debris and marked out clearly.
- Regular Site Inspection: Regular inspections should be carried out throughout the demolition process to identify and mitigate potential risks. This might involve checking for unstable structures, making sure tools and machinery are in good condition, and verifying that safety barriers remain intact.
- Emergency Protocols: A clear plan for emergencies, such as fires, structural collapses, or injuries, should be established. This includes having first aid kits on-site, clear evacuation routes, and emergency contact numbers readily available.
Procedures for Handling Hazardous Materials
- Identification: Before demolition begins, a survey should be conducted to identify any hazardous materials, such as asbestos, lead-based paints, or chemicals.
- Containment: Once identified, these materials need to be contained to prevent them from becoming airborne or contaminating other parts of the site. This might involve sealing off certain areas or using protective sheeting.
- Specialized Disposal: Hazardous materials cannot be disposed of like regular waste. There are strict guidelines for their disposal, and they often need to be taken to specialized facilities.
- Protective Gear: Workers handling hazardous materials should be equipped with appropriate protective gear. This might include respirators, gloves, and protective suits.
Training and Qualifications for Personnel
- Certified Training: All personnel should have undergone certified training specific to demolition activities. This ensures they’re familiar with the tools, machinery, and techniques used, as well as safety protocols.
- Specialized Training: Additional specialized training is essential for those handling hazardous materials or operating heavy machinery. This makes them knowledgeable in handling specific challenges and risks associated with their tasks.
- Regular Safety Drills: Even with training, regular safety drills should be conducted. This ensures that all workers remain familiar with emergency protocols and can respond swiftly when needed.
- Health Monitoring: Given the potential exposure to dust, chemicals, and other hazards, regular health check-ups and monitoring for all workers can help in the early detection of any health issues.
Conducting the Demolition: A Step-by-Step Approach
A step-by-step approach to conducting a selective demolition ensures that each phase of the project is completed without any problems and that the larger goal is achieved successfully.
Step #1: Pre-demolition Documentation and Photography
Before the demolition machinery is even switched on, detailed documentation serves as the base for all the actions that follow.
- Blueprint Analysis: Begin with a thorough analysis of the building’s blueprints or architectural drawings. These documents offer invaluable insights into the building’s structure, highlighting potential challenges and risks.
- Photographic Record: Take comprehensive photographs of the entire structure, with a special focus on areas slated for demolition. These images serve multiple purposes:
- Before-and-after Comparison: A photographic record can be valuable for future reference, especially when making comparisons between the initial state and post-demolition.
- Legal and Insurance Purposes: In case of disputes or claims, having a clear record of the site’s pre-demolition state can be invaluable.
- Safety Protocols: Photos can highlight potential dangers or challenges that might not be evident in a quick physical walkthrough.
Step #2: Isolating the Work Zone
This step ensures that the demolition work doesn’t inadvertently damage parts of the building meant to remain intact or put uninvolved personnel at risk.
- Physical Barriers: Erect sturdy barriers around the demolition zone. This could be in the form of fencing, hoardings, or even temporary walls.
- Signage: Clearly mark the work zone with signs indicating a restricted area.
- Utility Shut Off: Before the demolition begins, ensure that all utilities running through the designated area – such as gas, water, and electricity – are turned off. This prevents accidents like electrocutions, gas leaks, or flooding.
- Vibration Monitoring: Especially in urban or densely populated areas, the vibration caused by demolition can impact neighboring structures. By setting up vibration monitors, you can ensure that the demolition activities aren’t causing harmful disturbances to nearby buildings.
Step #3: Systematic Removal of Specified Elements
Selective demolition is not about speed but rather carefully dismantling specific elements without affecting the surrounding areas.
- Prioritization: Begin by identifying and listing the elements to be removed in order of priority. This could be based on safety concerns, ease of removal, or the needs of subsequent construction phases.
- Use of Appropriate Tools: Different elements require different tools for removal. For instance, removing a wooden beam may require different tools than taking out a concrete wall. Always ensure the right tool is used for each job to avoid unnecessary damage and ensure worker safety.
- Sequential Removal: Often, it’s not just about what is removed but also the order in which things are taken down. Some structures might be supporting others, so removing them first could compromise the integrity of the whole site.
- Continuous Monitoring: As elements are being removed, it’s essential to continuously monitor the site for any signs of instability or unforeseen challenges.
Step #4: Sorting and Storing Salvaged Materials
One of the benefits of selective demolition is the ability to salvage and reuse materials. But this requires careful handling.
- Material Separation: As elements are removed, they should be immediately sorted. This facilitates efficient recycling and disposal and ensures that salvageable materials aren’t accidentally discarded.
- Categorization: Once sorted, materials should be categorized based on type (wood, metal, brick, etc.) and quality. This aids in determining their potential for reuse or resale.
- Safe Storage: Salvaged materials should be stored safely to maintain their quality. This means keeping them away from the elements, so they aren’t overloaded or stressed, and categorizing them for easy access later.
Step #5: Site Cleanup and Preparation for Subsequent Phases
With the main demolition work done, it’s important to leave the site in a state that facilitates the next steps in the construction or renovation project.
- Debris Removal: All debris, both salvageable and waste, should be removed from the work zone. This makes the site safer and provides a clearer view for subsequent phases.
- Surface Preparation: Some surface preparation might be necessary depending on what the next phase entails. This could involve leveling the ground, preparing foundation trenches, or simply cleaning surfaces to facilitate reconstruction.
- Safety Review: After the cleanup, conduct a final safety review. Ensure no lingering hazards exist, like exposed wires, sharp objects, or unstable surfaces.
- Handover Documentation: Create a comprehensive report detailing the demolition work done, materials salvaged, and the state of the site post-demolition. This documentation will be invaluable for the teams handling the next phases.
Sustainability and Green Practices in Selective Demolition
With the construction and demolition industry being significant contributors to global waste, the importance of green practices in selective demolition can’t be understated.
Recycling and Repurposing Salvaged Materials
- Metal Salvaging: Metals, especially copper and steel, can be salvaged and sent to recycling facilities. Once processed, they can re-enter the market, reducing the need for new mining and smelting.
- Wood Recovery: Wooden beams, panels, and flooring can often be repurposed or milled down for other projects. This not only reduces deforestation but also limits the energy-intensive process of producing new wood products.
- Brick and Stone Reuse: Old bricks and stones can be cleaned and reused in other construction projects, preserving their embodied energy.
- Fixtures and Fittings: Items like doors, windows, plumbing fixtures, and light fittings can often be reused in renovations or resold, minimizing the energy and resources needed to produce replacements.
Minimizing Landfill Waste
- Efficient Sorting: By thoroughly sorting materials during demolition, recyclable and reusable items can be diverted away from the landfill.
- Deconstruction vs. Demolition: Whenever possible, opting for deconstruction (a method where buildings are taken apart piece by piece) over traditional demolition can dramatically reduce landfill contributions.
- Working with Recycling Centers: Establishing partnerships with recycling centers can ensure that a majority of the waste from a demolition site is processed correctly and returned to the market rather than ending up in a landfill.
Enhancing Energy Efficiency in Renovations
- Re-insulation: By selectively removing old insulation materials, new, more efficient ones can be installed to ensure better thermal performance of the building.
- Window and Door Upgrades: Post-demolition, there’s an opportunity to replace old windows and doors with energy-efficient models that reduce heat loss and improve overall energy conservation.
- Modern HVAC Systems: Once outdated infrastructure is removed, it becomes easier to install modern heating, ventilation, and air conditioning systems that consume less energy and provide better climate control.
- Green Building Materials: With old materials out of the way, there’s an opportunity to incorporate sustainable building materials in renovations, such as bamboo flooring, recycled-content tiles, or low-VOC paints.
Ensure Sustainability in Doing Selective Demolition
Selective demolition is a meticulous process that balances precision, safety, sustainability, and efficiency. This is why choosing the right demolition contractors for your demolition needs is crucial.
At Liberty Demolition, our commitment to excellence is reflected in every project we do. From residential to commercial, industrial, and, of course, selective demolition, our services prioritize safety, environmental responsibility, and unparalleled customer satisfaction. With our focus on efficient waste management and recycling, we promise a seamless, eco-friendly solution tailored to your requirements.
Take the next step in your project with confidence with our demolition contractors in Philadelphia. Choose Liberty Demolition, where every project is proof of our commitment to the environment and our clients. Ready to start? Contact Liberty Demolition today.