

To demolish a house, do the following steps:
- Careful planning and decision-making.
- Tear down the drywall.
- Remove doors and frames.
- Tear out flooring materials.
- Demolish the bedrooms.
- Begin bathroom demolition.
- Demolish the laundry area.
- Deconstruct the kitchen and dining room
Learn more about the steps on how to demolish a house below.
Step #1: Getting Started – Planning
There are several reasons homeowners and property developers choose to demolish a house, including the following:
- Structural Issues. Sometimes, a house may have foundational problems or other structural defects that can be more expensive to repair than building new ones.
- Modernization. As architectural trends evolve, some choose to demolish older structures to make way for modern, more efficient designs.
- Land Value. In prime locations, the value of the land might far exceed the value of the house on it.
- Changing Needs. A growing family or a different lifestyle might require a different kind of house.
- Environmental Concerns. Older homes might not be environmentally efficient. Rebuilding can provide a more sustainable living space.
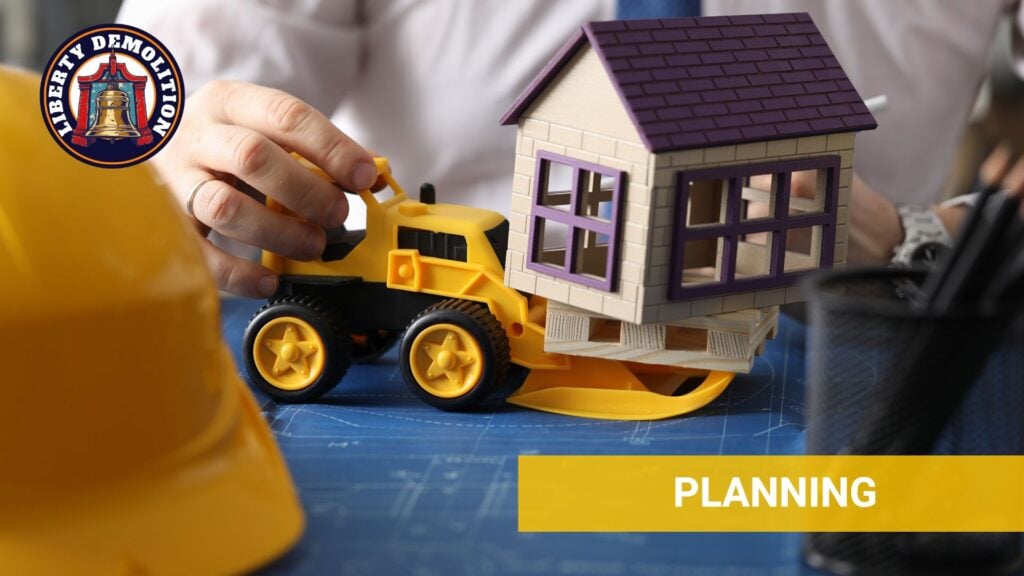
How to Demolish a House: The Importance of Careful Planning
Demolishing a house isn’t as simple as swinging a wrecking ball and hoping for the best. Without proper planning, the demolition process can be dangerous and can pose risks to both workers and neighboring properties. It ensures that resources are used optimally to prevent unnecessary expenses.
Moreover, there are legal regulations and permits associated with house demolitions. Planning ensures adherence to all local and state laws. It can also minimize environmental harm and see to it that waste is disposed of responsibly and recyclable materials are salvaged.
Deconstruction vs. Demolition
Deconstruction is a more manual and meticulous process where workers take apart the house piece by piece. The primary goal is to salvage useful materials for reuse. It’s an eco-friendly approach, as it reduces waste and allows for recycling and repurposing of materials.
On the other, demolition is about bringing down the structure, typically using heavy machinery. It’s faster than deconstruction but tends to generate more waste. After the house is demolished, the debris is typically hauled away as construction waste.
Deconstructing the Interior: Preliminary Factors and Project Planning
Before beginning with the deconstruction of a house’s interior, you must first look into the following factors to ensure a smooth operation:
- Assessment of Structure. It determines which parts can be deconstructed without causing collapse or danger.
- Inventory. Conduct an inventory of valuable or reusable materials.
- Permits and Legalities. Check local regulations and obtain necessary permits.
- Utility Disconnections. Before any work begins, ensure utilities like gas, electricity, and water are disconnected.
- Safety Measures. Identify potential hazards like asbestos, lead paint, or mold.
- Timeline and Labor. Create a timeline for the project. Determine the number of workers required and allocate tasks accordingly.
Necessary Tools and Equipment
Various tools and equipment are essential when deconstructing the interior:
- Basic Hand Tools. Hammers, screwdrivers, pliers, and pry bars
- Protective Gear. Safety helmets, goggles, gloves, and steel-toed boots
- Saws. Different types, such as reciprocating saws or hand saws
- Drills. For removing screws or drilling holes
- Ladders and Scaffolding. To access elevated areas safely
- Containers and Bins. For segregating and storing salvaged materials
- Dust Masks and Respirators. Especially important if dealing with mold, asbestos, or other harmful substances
- Utility Knives. Useful for cutting through drywall, carpeting, or other soft materials.
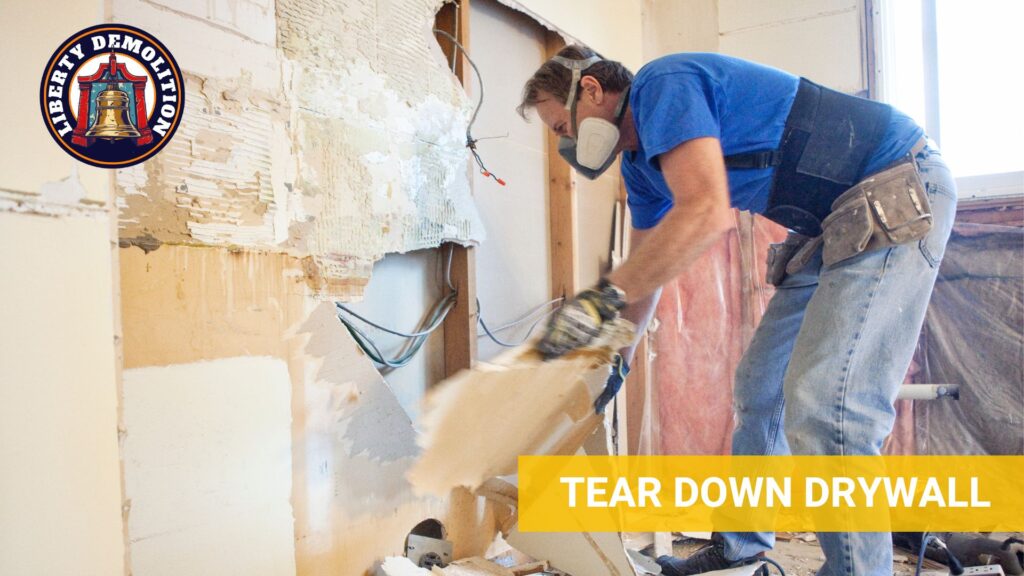
Step #2: Tear Down Drywall
- Cover the floor with plastic sheets or drop cloths to catch debris and simplify cleanup.
- Remove all furniture, decorations, and other obstructions from the area.
- Turn off the electricity at the circuit breaker and remove outlet covers and switch plates.
- Remove the wallpaper. Start by peeling a corner of the wallpaper using a putty knife. Some wallpapers may come off easily in large strips. For stubborn wallpapers, consider using a wallpaper steamer, which uses steam to soften the adhesive.
- Wash the walls with a mild detergent to remove any leftover adhesive and ensure a clean surface for further work.
- Using a sledgehammer or framing hammer, begin by making a hole in the center of the wall.
- Extend this hole horizontally and vertically, being cautious of any plumbing or electrical components.
- Pull down the pieces of drywall by hand and dispose of them in designated bins.
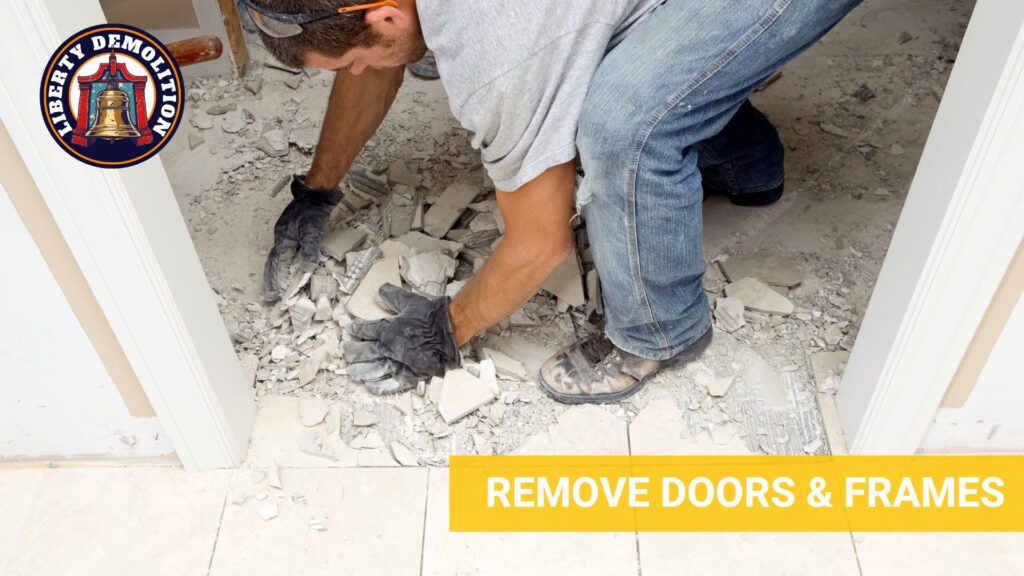
Step #3: Remove Doors and Frames
- Clear the immediate area around the door to give yourself space to work.
- Begin by identifying the door pins on the hinges. Using a hammer and a nail or a pin punch, gently tap the bottom of the hinge pin until it begins to move upward. Once it’s sufficiently raised, you can grip it with pliers and slide it out entirely. Do this for each hinge on the door.
- With all hinge pins removed, grip the door firmly (it’s a two-person job for heavier doors) and lift it away from the frame. Place it gently on a surface that won’t scratch or damage it.
- Unscrew any door knobs, locks, or other hardware from the door using the appropriate screwdriver. Keep all hardware components together in a bag or container, especially if you plan to reuse or donate them.
- Start removing the door frame by prying off any trim or molding around the door frame using a pry bar or chisel.
- The door frame is usually secured with nails or screws. Locate these fasteners and remove them. Using the pry bar, carefully wedge it between the frame and the wall, prying the frame out bit by bit. Work your way around the frame until it’s completely detached.
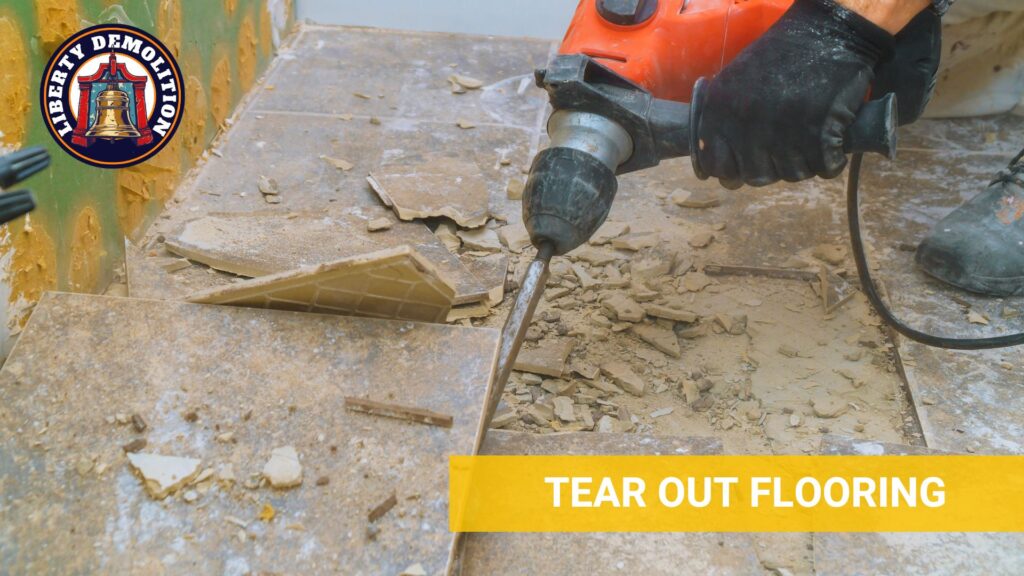
Step #4: Tear Out Flooring Materials
The steps you need to do depend on the flooring materials you need to handle.
Carpets
- Wear gloves, protective eyewear, and a mask. The underpadding of older carpets can produce significant amounts of dust. Ventilate the area well.
- Choose a corner or a section of the room. Using pliers, grip the carpet and pull upwards to detach it from the tack strip.
- Once you’ve created an opening, use a utility knife to cut the carpet into manageable sections (usually 3-4 feet wide). This will make it easier to roll up and dispose of.
- Once the carpet is removed, the underpadding will be visible. It is typically stapled down. Pull it up in sections, and use pliers or a screwdriver to remove any remaining staples.
- If you won’t be reinstalling the carpet, remove the tack strips using a pry bar or chisel. Be careful, as the tacks are sharp.
Tiles
- Tiles can shatter, producing sharp edges. Always wear safety goggles, gloves, and long-sleeved clothing.
- Begin with a broken tile or use a chisel and hammer to break one, creating an opening.
- Using a chisel, flat bar, or floor scraper, work underneath tiles to pry them up. Be patient, as some tiles may be more stubborn than others.
- Once all tiles are removed, you’ll likely need to address the adhesive. Depending on the type, you may be able to scrape it off or might require a solvent or adhesive remover.
Linoleum or Vinyl Flooring
- It’s often easiest to start at a doorway or edge where the linoleum has already begun to peel or where you can easily lift it with a scraper or knife.
- Linoleum can sometimes be peeled back in large sheets, but older or glued-down flooring may require more effort.
- Once the linoleum is up, there will often be adhesive left behind. A combination of scraping and solvents can help. Ensure good ventilation if using chemical solvents.

Step #5: Repeat the Process in Bedrooms
When deconstructing multiple rooms, especially bedrooms, a systematic and organized approach is crucial. This helps in maintaining efficiency and to minimize damage to salvageable items.
- Prioritize which room to start with. If you have more than one bedroom, you might consider starting with the smallest or least cluttered to get a feel for the process.
- Designate a nearby area (hallway or another room) as a staging or holding space for materials you plan to salvage, recycle, or dispose of.
- Take photos of the rooms before starting. This provides a reference of the original state of the room and can help in identifying fixtures and features.
Remove the Fixtures
- As you remove fixtures and features, label them. This can be especially useful if you plan to reinstall or sell them.
- Remove the fixtures. Turn off the electricity. Carefully unscrew or unclip the light fixtures.
- Use a pry bar, starting at the top, to gently remove shelves and then the supporting structure. Ensure that you don’t damage walls unnecessarily.
Remove the Walls
- When deconstructing walls, identify load-bearing walls and potential hazards. Mark them to avoid accidental damage.
- Remove wallpaper, drywall, or wall panels.
Remove the Flooring
Follow the previously mentioned steps on how to remove flooring depending on the type and construction.
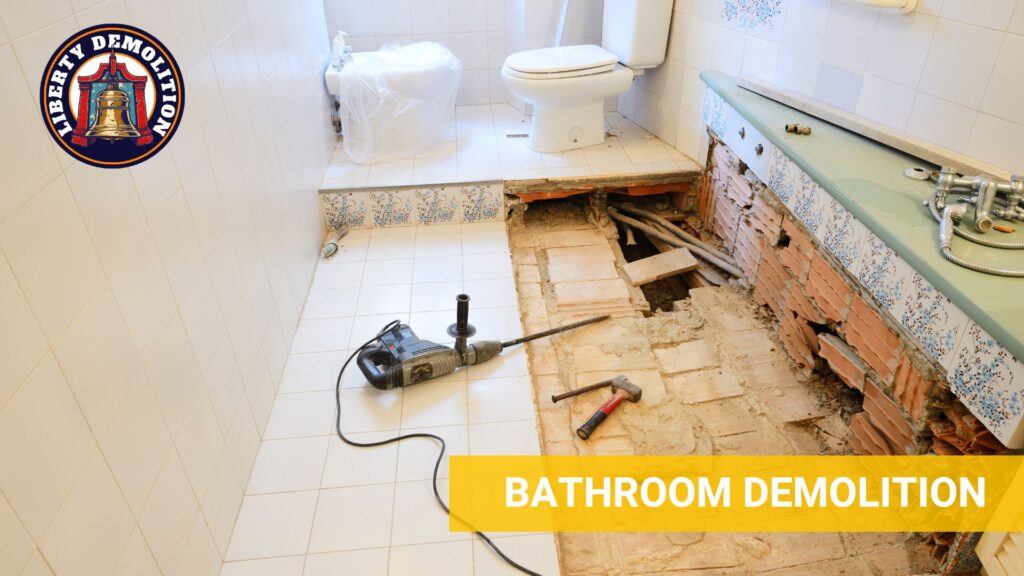
Step #6: Begin Bathroom Demolition
The bathroom, with its unique fixtures, plumbing, and often different types of materials compared to other rooms, requires a specialized approach during deconstruction. It’s crucial to ensure that plumbing and electrical systems are safely managed while also focusing on preserving reusable items.
Ensure you’re wearing protective gear – gloves, safety glasses, and a mask. Before starting, turn off the water supply to the bathroom and ensure that electricity to this area is also turned off from the main switchboard.
- Detach the sink. Start by disconnecting the water supply lines using a wrench. Unscrew and remove the drain. The sink should now be free to lift off.
- Once the sink is removed, use a pry bar or screwdriver to detach the vanity from the wall.
- Remove the toilet. Shut off the water supply and flush the toilet to drain the tank. Use a sponge or towel to absorb any remaining water in the tank and bowl.
- Unscrew the bolts at the base. Carefully rock the toilet back and forth to break the wax seal and lift it out.
- For the bathtub and shower, start with the faucet and showerhead. Use a wrench to unscrew and remove them.
- Remove surrounding tiles or panels. Starting from a corner, use a chisel and hammer or pry bar to remove tiles or panels.
- Remove the bathtub. Disconnect the drain and overflow. If the tub is caulked to the floor, use a utility knife to cut through the caulk. Use a pry bar to lift out the tub.
- Remove the flooring. Start removing the tiles from a corner or edge. Use a chisel and hammer to lift the first tile. Once you’ve created a starting point, you can continue removing the rest using a pry bar.
- If the flooring is linoleum or vinyl, start from an edge and use a utility knife to cut manageable strips. Use a scraper or pry bar to lift and remove.
- Remove the walls. As with floor tiles, start from a corner and use a chisel and hammer. Work your way across the wall.
- For drywalls, you can cut and remove in sections, especially if you’re looking to check or preserve plumbing behind.
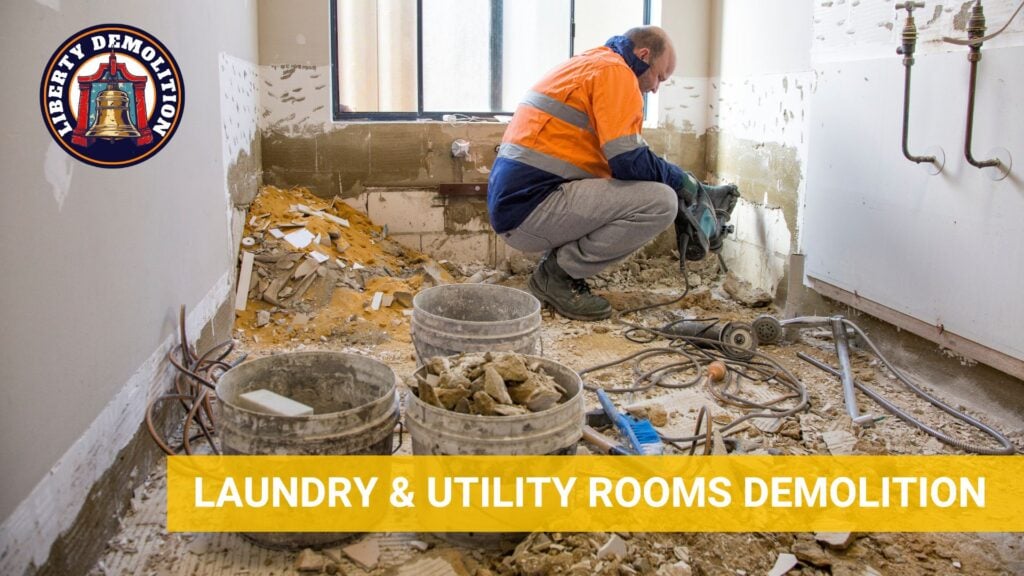
Step #7: Handle the Laundry and Utility Rooms
Laundry and utility rooms are unique spaces in a home. They’re generally designed to house appliances and systems that serve the entire home, such as washing machines, dryers, water heaters, HVAC units, electrical panels, and sometimes even larger plumbing fixtures. Deconstructing these areas requires particular attention due to the specialized equipment and potential hazards.
Washing Machines
Turn off the water valves for both hot and cold supplies. Disconnect the hoses from the back of the machine. Be prepared with towels or buckets, as some water may spill out. Carefully disconnect the drainage hose and make sure that no residual water spills out. Unplug the washing machine from the wall outlet.
Dryers
If it’s an electric dryer, simply unplug it from the wall outlet. For gas dryers, after shutting off the gas valve, carefully disconnect the gas line. Detach the vent hose, which leads outside, from the back of the dryer.
Utility Cabinets
Before removing cabinets, ensure you’ve emptied them of all contents. Use a screwdriver or drill to remove screws that attach cabinets to the wall. If caulked, use a utility knife to cut through the caulk. For lower cabinets, see to it that you disconnect any plumbing fixtures or utility connections running through them before removal.
Water Heaters
If electric, turn off the power from the main circuit breaker. For gas heaters, turn off the gas supply. Turn off the water supply and attach a hose to drain the heater. Ensure it’s fully drained before attempting to move. For electric heaters, disconnect the power supply wires. For gas heaters, disconnect the gas line.
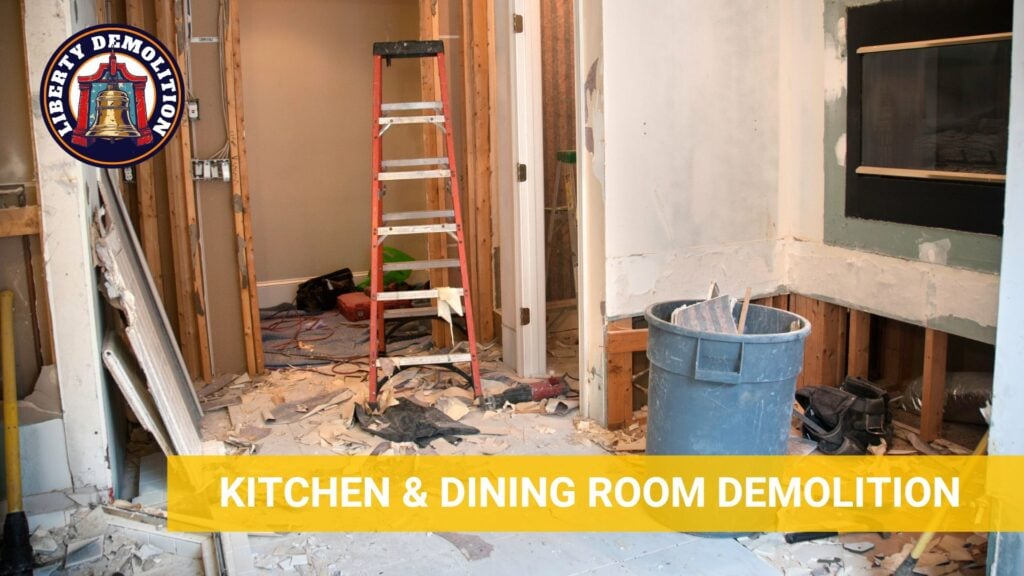
Step #7: Deconstruct the Kitchen and Dining Room
The kitchen, often termed the heart of the home, is a complex space with a combination of intricate electrical, plumbing, and gas systems. Demolishing this space requires a strategic approach, both to minimize risks and to ensure valuable components are salvaged properly.
- Before beginning, shut off all utilities – electricity, water, and gas. Label switches and valves to avoid confusion.
- Document a step-by-step approach, deciding the sequence in which you’ll remove fixtures, appliances, and other components. Typically, it’s best to start from the top (cabinets) and work your way down (flooring).
Salvaging Key Kitchen Components
Appliances
- Before removing appliances, empty them completely. This includes refrigerators, ovens, and dishwashers.
- For refrigerators, disconnect the water line (if connected to a dispenser or ice machine). Carefully move the refrigerator away from the wall and unplug it.
- For ovens and stoves, if gas-powered, ensure the gas line is shut off. Electric ovens should be unplugged from the wall. Slide them out cautiously.
- For dishwashers, turn off water and power connections. Disconnect the water line, drainage, and power cables.
Countertops
- Use a utility knife to cut through caulk or adhesive where the countertop meets the wall or backsplash.
- If it’s a stone or solid surface, be aware of its weight. You may need assistance or specialized equipment to lift and transport it without damage.
Cabinets
- Empty all cabinets. Remove doors first by unscrewing the hinges. This makes the frame lighter and more manageable.
- For upper cabinets, start at one end and work your way across. Ensure you have support, especially when removing the last few screws, to prevent the cabinet from falling.
- For lower cabinets, once doors are removed, detach any screws connecting them to the wall or floor.
Flooring Materials
Depending on the type of flooring (tiles, hardwood, linoleum), the removal process will vary. For tiles, start at a corner, chipping away using a chisel and hammer. For hardwood or laminates, identify a starting point (usually at an edge) and pry the boards up. Linoleum can be pulled up, but the adhesive underneath might require a scraper.
Dining Room
If connected to the kitchen, the dining area might have fixtures or built-in furniture to deconstruct. Carefully remove built-in benches or cabinets using the same principles as kitchen cabinets. Salvage any chandeliers or light fixtures by first turning off the electricity and then disconnecting the fixture from its electrical box.
Liberty – Demolition Made Easy
Demolishing a house demands careful planning, knowledge of various techniques, and stringent adherence to safety and environmental protocols. Whether you’re opting for manual deconstruction or you plan to employ demolition contractors equipped with heavy machinery for a complete takedown, every step is crucial and demands attention to detail.
While you can take the simpler steps on how to demolish a house, it’s best to hire the pros when the tasks become more complicated. This is where you can let us handle the job. We at Liberty Demolition offer a comprehensive range of services, from residential to selective demolition.
With a strong commitment to customer satisfaction, coupled with efficient waste management and recycling protocols, Liberty Demolition doesn’t just bring down structures; we see to it that the entire process is a seamless, eco-friendly solution tailored to your needs.
If you’re about to begin a demolition project, remember expertise, safety, and environmental responsibility are non-negotiable. And who better to entrust with this task than Liberty Demolition? For a demolition experience that stands out in professionalism, safety, and eco-consciousness, reach out to Liberty Demolition today. Your future projects deserve nothing but the best!