
Interior demolition refers to the targeted removal of the inside components of a structure without affecting its exterior. This process can include the elimination of walls, ceilings, and flooring to prepare for a space’s renovation or repurposing.
Intrigued? Let’s get inside information about the process in this interior demolition guide.
What Is Internal Demolition?
Internal or interior demolition, often termed ‘soft demolition,’ is the selective dismantling of interior elements of a structure without affecting its exterior. While it sounds straightforward, the process requires meticulous planning, expertise, and the right tools to ensure safety and efficiency.
Common Scenarios Requiring Soft Demolition
- Home Renovations: Kitchen revamp, a bathroom makeover, or reconfiguring rooms
- Commercial Space Remodelling: Space repurposing for office buildings to shopping malls
- Restoration: Restoration of buildings damaged by fire, water, or other calamities
- Historic Renovations: Preserving the external facade while updating the interiors of historic landmarks
- Preparation for a Full Demolition: Sometimes, before a complete teardown, selective interior demolition is necessary to remove hazardous materials or salvage reusable items.
Why Choose Interior Demolition?
This is not merely about tearing down old walls or clearing out outdated fixtures but rather a project with an eye on achieving a specific objective:
Space Optimization
- Efficient Use of Space: Many choose interior demolition to make better use of existing space.
- Flexibility in Design: Soft demolition can mold the interior without major architectural changes.
- Meeting Modern Needs: This allows structure owners to adapt their spaces to contemporary needs.
Structural Safety Improvements
- Identification of Hidden Issues: When walls and ceilings are stripped down, it’s easier to identify structural issues, like cracks or weak points.
- Eradication of Health Hazards: Interior demolition can uncover issues, such as mold, mildew, and other potentially harmful organisms behind walls or ceilings.
- Upgrading Infrastructure: Interior demolition allows upgrading outdated electrical, plumbing, or HVAC systems that aren’t up to current codes.
Property Value Enhancement
- Modern Appeal: Property owners can command higher prices or rents by updating an old-fashioned or deteriorated interior.
- Efficiency Improvements: Modern interiors often prioritize energy efficiency, from improved insulation to energy-efficient lighting and appliances.
- Attractiveness to a Broader Audience: A well-executed interior demolition and subsequent renovation can help transform a niche or outdated property into one that appeals to a more extensive range of potential buyers or tenants.
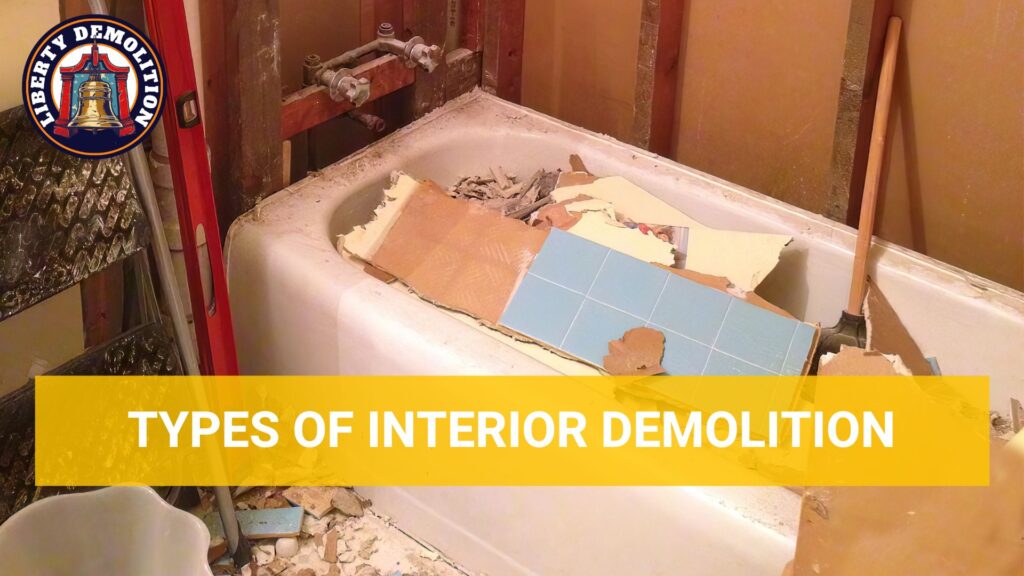
Types of Interior Demolition
Interior demolition can be broken down into specific categories based on the targeted area within a structure.
Kitchen Demolition
Over time, appliances break down, countertops get scratched, and cabinets start to look tired. A full kitchen demolition can breathe new life into this vital space, but it’s not a simple task.
Step 1: Remove Appliances and Other Kitchen Items
Make sure all appliances are unplugged, and gas lines are shut off. For bigger appliances like refrigerators, it’s essential to defrost them a day before. Remove all movable items such as the oven, refrigerator, dishwasher, and microwave. If you’re planning to reuse or donate any appliances, keep them in a safe spot.
Step #2: Remove Kitchen Countertops
Different countertop materials (granite, laminate, quartz) require different removal techniques. Start by prying the countertop edges using a pry bar or putty knife. Once an edge is free, the rest often comes off more easily.
Step #3: Remove All Cabinet Drawers and Doors
Before removing anything, label each door and drawer. Use a screwdriver or a drill to detach doors from hinges. For drawers, simply pull them out of their tracks.
Step #4: Remove Flooring
Understand whether the kitchen floor is laid over a subfloor or concrete. This will influence the removal technique. For tiled floors, start by breaking a tile in the center using a hammer. Then, using a chisel and mallet, move outwards as you pry up the tiles. For laminate or wood flooring, find an edge (often near a cabinet or appliance) and start prying. Once the first plank or piece is up, the rest will follow suit.
Step #5: Final Cleaning
Once everything has been removed, sweep thoroughly and then vacuum. Make sure no nails, screws, or other sharp objects are left on the floor. Dispose of debris according to local regulations.
Bathroom Demolition
Though typically smaller than kitchens, bathrooms come with their own challenges during demolition, largely due to the plumbing involved.
Step #1: Remove the Toilet
Before any work begins, turn off the water supply to the toilet. Flush the toilet once or twice to drain the water from the tank and bowl. Remove the nuts at the base of the toilet (usually capped and located on either side). Once these are out, you can lift the toilet, preferably with a helper, given its weight.
Step #2: Remove the Vanity and Sink
Start by turning off the water supply valves located beneath the sink. Then, using a wrench, disconnect the water lines and remove the drainpipe. If the vanity is screwed into the wall, use a drill or screwdriver to remove these screws. With a putty knife or pry bar, carefully work your way around the vanity’s edges to break any caulk seal before pulling it away from the wall.
Step #3: Remove the Tiles
Wear protective eyewear and gloves. Tiles can break into sharp shards. Use a chisel and hammer to tap away at the edges of the tiles. If you’re planning to save the wall, be very gentle to avoid damaging the drywall or backer board. If not, you can be more aggressive with your removal technique.
Step #4: Remove the Bathtub
Begin by shutting off the water supply. Then, disconnect the faucet, showerhead, and drain. Cut along the edges where the tub meets the wall with a utility knife. This will break any caulk or adhesive seal. Using a pry bar, start at one end of the tub, working it free. Once it’s loose, you’ll need a helper or two to lift the tub out, as it’s quite heavy.
Step #5: Final Cleaning
Collect all the large debris and dispose of them as per local regulations. Do a thorough sweeping and vacuuming and double-check the space for any overlooked sharp items or nails. Cap off any exposed plumbing to prevent water damage or potential accidents.
Flooring Demolition
Over time, wear and tear, shifting trends, or functional requirements can require a change in the flooring. Here’s a look at the demolition process for different types of flooring:
Hardwood Flooring
- Always wear safety glasses and protective gloves.
- Start at an edge, preferably near a wall. Sometimes, the edge might be concealed beneath baseboards or molding, which should be carefully removed.
- Using a pry bar or a similar tool, begin lifting the hardwood boards. Hardwood is often nailed down, so expect some resistance.
- Once the boards are removed, ensure all nails or staples are pulled from the subfloor or hammered down flat. This step is crucial to prepare for new flooring installation.
- Inspect the subfloor for damage.
Tile Flooring
- Since tile can shatter, wearing safety goggles, gloves, and even protective clothing is essential.
- Break the first tile. Start by shattering a tile using a hammer. This provides an entry point to begin the removal process.
- Position a chisel or a similar tool at an angle to the floor and tap using a mallet. This will help in prying up the tiles. Continue this process tile by tile.
- Tiles are typically set using thin-set mortar. Once the tiles are removed, this adhesive layer remains on the subfloor. Use a floor scraper to remove as much thin-set as possible.
- For a new floor to be installed, make the surface smooth by removing all remnants of adhesive and grout and leveling the floor.
Vinyl Flooring
- Wear gloves and safety glasses. Old vinyl floors might contain asbestos, especially those installed before the 1980s. If unsure about the composition, getting it tested before proceeding is advised.
- Starting at a corner or edge, use a utility knife to cut a small section of the vinyl flooring and underlying adhesive.
- Use a scraper or pry bar to lift the vinyl off the floor. If the vinyl is glued down, this can be labor-intensive. Sometimes, heating the vinyl slightly (using a heat gun) can make this process easier by softening the adhesive.
- Once the vinyl is up, there will likely be adhesive residue. You can use a floor scraper to remove it. Consider using an adhesive remover or thinners for more stubborn adhesive, but ensure the space is well-ventilated.
Demolition of Walls
The type of wall being demolished will dictate the methods and precautions required:
Drywall
- Equip yourself with safety goggles, a dust mask, and gloves.
- Start by removing baseboards, moldings, and any other trim on the wall. If there are electrical outlets or switches, turn off the electricity and remove their faceplates.
- Create an initial opening in the wall. This can be done using a hammer. This hole will allow you to get a sense of any wiring, plumbing, or insulation located behind the drywall.
- Using a utility knife or a drywall saw, cut the drywall into sections. This makes it easier to remove and dispose of. Pry off each section using a pry bar.
- Once the drywall is removed, you’ll be left with the studs and any internal components like wiring. If the studs need to be removed, ensure that wiring and other utilities are safely rerouted or capped off.
Load Bearing Wall
- Before proceeding with the demolition of a load-bearing wall, it’s important to consult with a structural engineer. These walls support the weight of your home, and removing them without proper precautions could lead to significant structural issues or even a collapse.
- Set up temporary support structures, like support beams or jacks, before removing the walls. They will carry the load during the demolition.
- Given the risk involved in this process, always wear a hard hat, safety goggles, and protective gloves.
- Unlike drywall, where you can cut large sections, with load-bearing walls, it’s better to proceed slowly and methodically. This often means removing one brick or section at a time.
- Once the wall is down, based on the advice of the structural engineer, you might need to replace it with beams or columns to ensure the weight of the structure is adequately supported.
Do I Need to Obtain a Permit for Interior Demolition?
Permits are a crucial aspect of many interior demolition projects. They ensure that all work adheres to local safety codes and standards. Permitted work can enhance the value of your property. When it’s time to sell, potential buyers often prefer homes where remodeling work has been properly permitted and inspected.
Proceeding without required permits can result in substantial fines or even the requirement to undo the work that has been done. This can be costly both in terms of time and finances.
When Are Permits Required?
Here’s a quick look at when, why, and how to obtain a permit for interior demolition:
| Aspect | Details |
| Why Permits Matter | |
| Safety Assurance | Ensures work meets local safety codes and standards. |
| Property Value | Boosts property value with compliant remodeling work. |
| Avoiding Fines | Avoids potential fines or redoing non-compliant work. |
| When are Permits Required? | |
| Load-Bearing Wall Removal | Vital for structural integrity; typically requires a permit. |
| Major Structural Changes | Any significant alteration affecting building structure needs a permit. |
| Plumbing/Electrical Changes | Moving/adding fixtures or outlets often requires a permit. |
| Asbestos or Lead Removal | Regulated removal due to health risks. |
| When Might Permits Be Unnecessary? | |
| Cosmetic Changes | Simple updates like painting or minor repairs. |
| Flooring Replacement | Typically seen as a cosmetic change; usually doesn’t require a permit. |
| How to Obtain a Permit | |
| Local Building Department Visit | Get forms and necessary documentation list. |
| Provide Detailed Plans | Submit plans/blueprints for major changes. |
| Pay Fees | Varies based on work extent and locality. |
| Undergo Inspections | Ensures work is up to code post-renovation. |
Proper Disposal of Demolition Waste and Debris
One aspect of interior demolition that often gets overlooked in the initial excitement of renovating is the inevitable aftermath: heaps of debris, waste materials, and unwanted items.
Understanding Different Waste Types
- Non-hazardous Waste: This category includes most general debris like bricks, concrete, wood, glass, tiles, and some metals. While they don’t pose an immediate threat, they still require specific disposal methods.
- Hazardous Waste: Old homes can conceal dangerous materials. Lead, asbestos, certain paints, solvents, and chemicals fall under this umbrella. Special precautions are required for their safe removal and disposal.
- Universal Waste: Items like batteries, fluorescent lamps, and certain electronics might emerge during demolition. They need separate handling due to the hazardous substances they contain.
Hire a Dumpster Rental
- Choose the Right Size: Dumpsters come in various sizes, ranging from 10 to 40 cubic yards. Evaluate the scale of your project to determine what size you’ll need.
- Understand the Restrictions: Not all waste can be tossed into a rented dumpster. Hazardous and universal waste often require separate disposal methods.
- Maximize Dumpster Usage: Break down materials to save space.
Recycling and Repurposing
- Metal and Wood: Both of these materials are highly recyclable. Separating them from other debris can reduce your waste and provide valuable resources for recycling facilities.
- Fixtures and Fittings: Instead of tossing out old light fixtures, sinks, or cabinets, consider donating them to local charities, schools, or community centers.
- Repurpose Creatively: Old wood can become rustic furniture or wall art.
Hazardous Waste Disposal
- Identification: If unsure, consult professionals or testing services.
- Safe Handling: Always wear protective gear when handling hazardous materials.
- Specialized Disposal Centers: Most cities have dedicated centers for hazardous waste disposal. They’re equipped to handle and neutralize these materials safely.
Landfill Disposal
- Avoid Overfilling: Landfills are becoming increasingly filled, so it’s essential to only resort to this method when recycling or repurposing isn’t feasible.
- Understand Costs: Disposing of materials in a landfill often incurs fees. It’s good to be aware of these costs in your project budget.
Eco-friendly Disposal Options
- Green Dumpsters: Some companies specialize in eco-friendly waste disposal, which aims to recycle as much as possible and reduce landfill waste.
- Local Recycling Programs: Participate in community or city-wide recycling initiatives. These programs might even offer pick-up services for certain materials.
Nail Your Next Demolition Project
Renovating a space is no small task, and understanding the intricacies of interior demolition is important for a successful project. But remember, while DIY is admirable, sometimes leaning on professional demolition contractors ensures efficiency, safety, and environmental responsibility.
At Liberty Demolition, we’ve established a reputation for excellence in demolition. Whether you’re eyeing a residential overhaul, a commercial revamp, or even a selective teardown, our team of demolition contractors in Philadelphia is equipped to handle it all, staying true to our core values. Our expertise doesn’t end at tearing things down; our eco-friendly waste management and recycling practices ensure a seamless, green solution for all your demolition requirements.
When planning your next project, consider partnering with experts who care as much about the environment and safety as you do. Reach out to Liberty Demolition, and let’s nail your demo project at once.